Virtual and Augmented Reality together are now referred to as XR or “Extended-Reality”. You’re in the right place at the right time to build something amazing in XR!
XR applications can be created in Unity for many devices, our focus will be on Microsoft Hololens and the Meta Quest 2 – in this blog post series we will specifically focus on Meta Quest 2 in the latest Unity 2022.
So you want to make an XR game? Me too! Let’s start by creating a game object whenever we click our trigger and then make it shoot out from our controller 🙂
Here’s my XR Step-by-Step blog series to help you create your XR experiences!
Unity 2022
1) Installing the Tools you need for XR development == Unity 2022
2) Setting up your Meta Quest XR project in Unity 2022!
3) Helpful Asset Packages & Libraries for Unity 2022
4) Organizing your Unity Projects
5) Setting up Mixed-Reality Passthrough for your Meta Quest XR project in Unity 2022!
6) Setting up Touch Controller for your Meta Quest XR project in Unity 2022!
7) XR Game: Create and Shoot in your Meta Quest XR project in Unity 2022!
8) XR Game: Animations and Sound in your Meta Quest XR project in Unity 2022!
Unity 2021
1) Installing the Tools you need for XR development == Unity 2021
2) Setting up your Oculus Quest XR project in Unity 2021!
3) Setting up Mixed-Reality Passthrough for your Oculus Quest XR project in Unity 2021!
4) Keep your XR project safe with a GitHub Code Repo!
5) Setting up Touch Controller for your Oculus Quest XR project in Unity 2021!
6) Coding your Touch Controller for your Oculus Quest XR project in Unity 2021!
Full Step-by-Step Instructions!
- (Web Browser) Go to the Unity asset store (https://assetstore.unity.com/) -> Search for free explosion -> scroll down until you see Cartoon FX Free (https://assetstore.unity.com/packages/vfx/particles/cartoon-fx-free-109565)
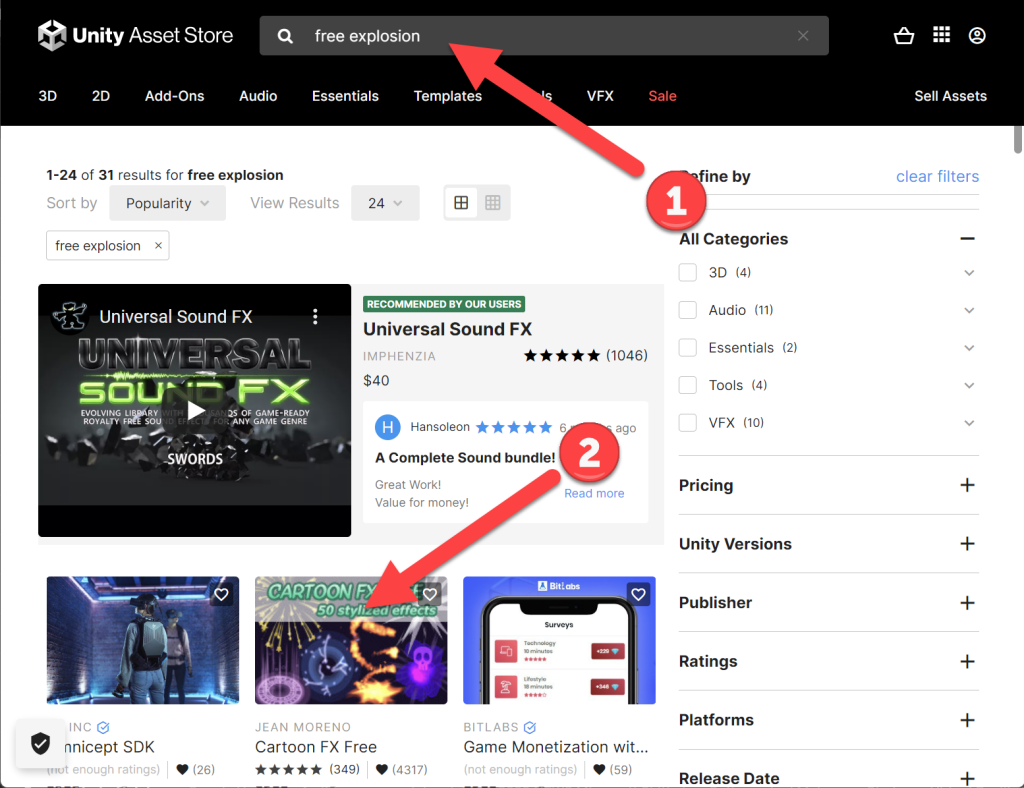
- Click on Add to my Assets (you will need to log in / setup an account so it shows up in your Unity app)

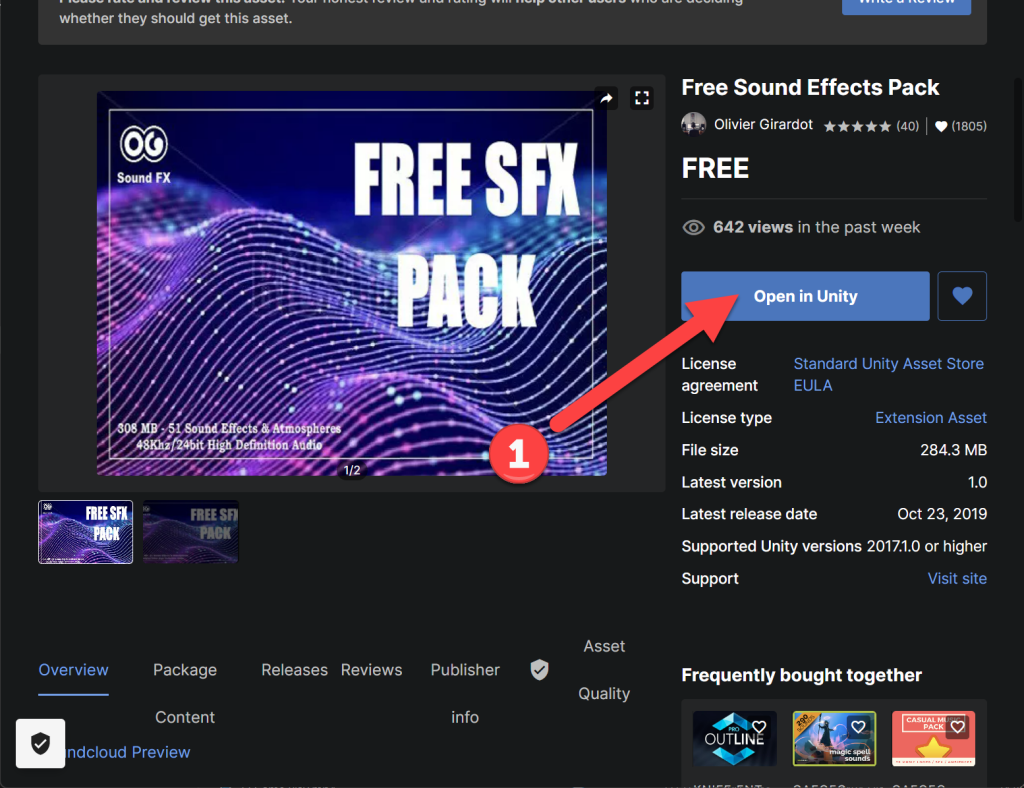
- (Web Browser) Go back to the Unity asset store (https://assetstore.unity.com/) -> Search for free sounds-> scroll down until you see Free Sound Effects Pack (https://assetstore.unity.com/packages/audio/sound-fx/free-sound-effects-pack-155776)
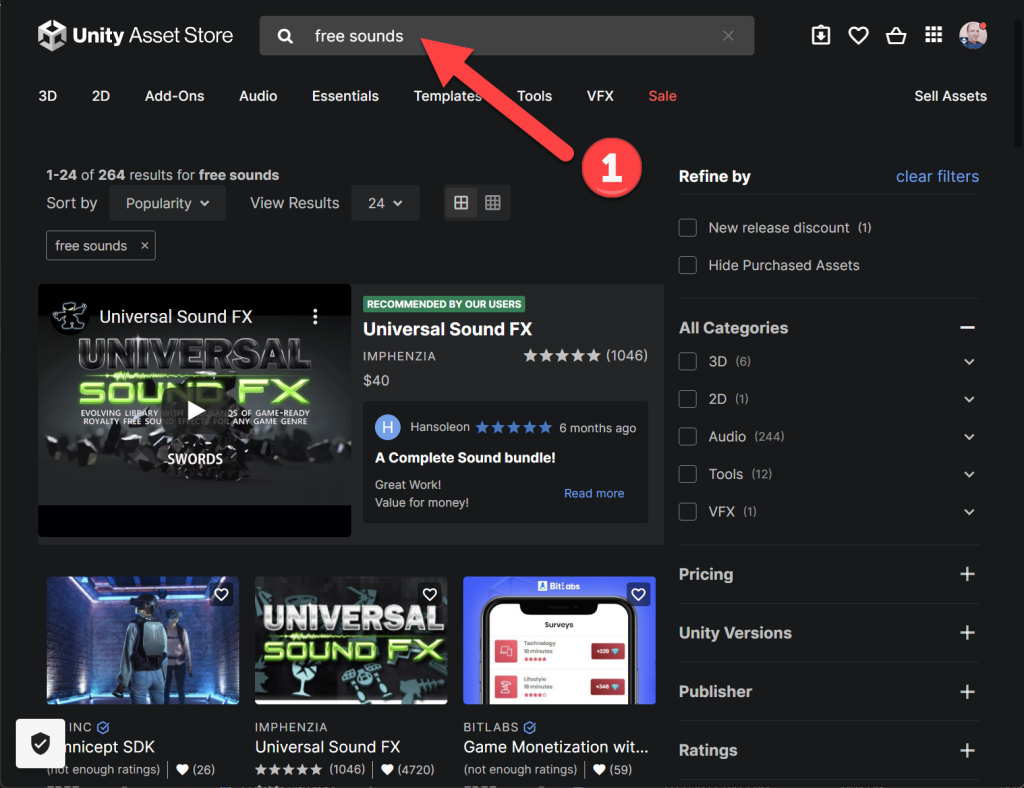
- Click on Add to my Assets
- (Toolbar) Window -> Package Manager
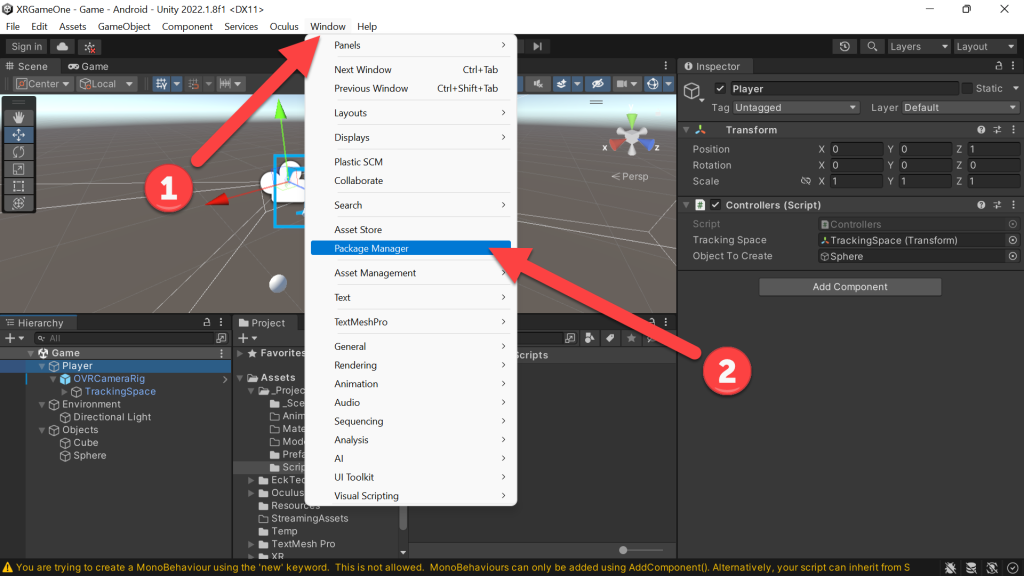
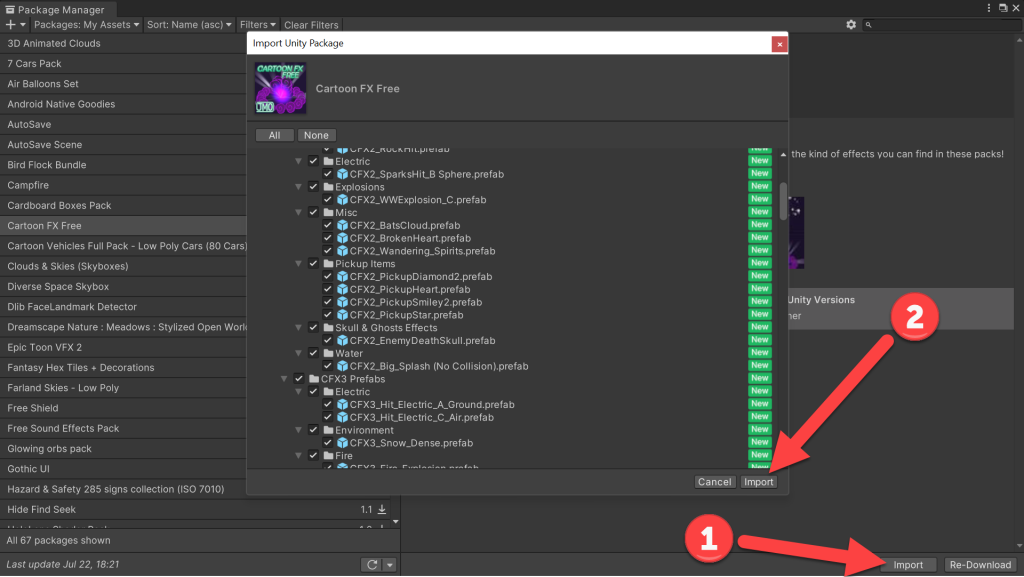
- (Package Manager) Search for Cartoon FX Free -> Click Download

- (Package Manager) Click Import -> (Import Unity Package) Click Import
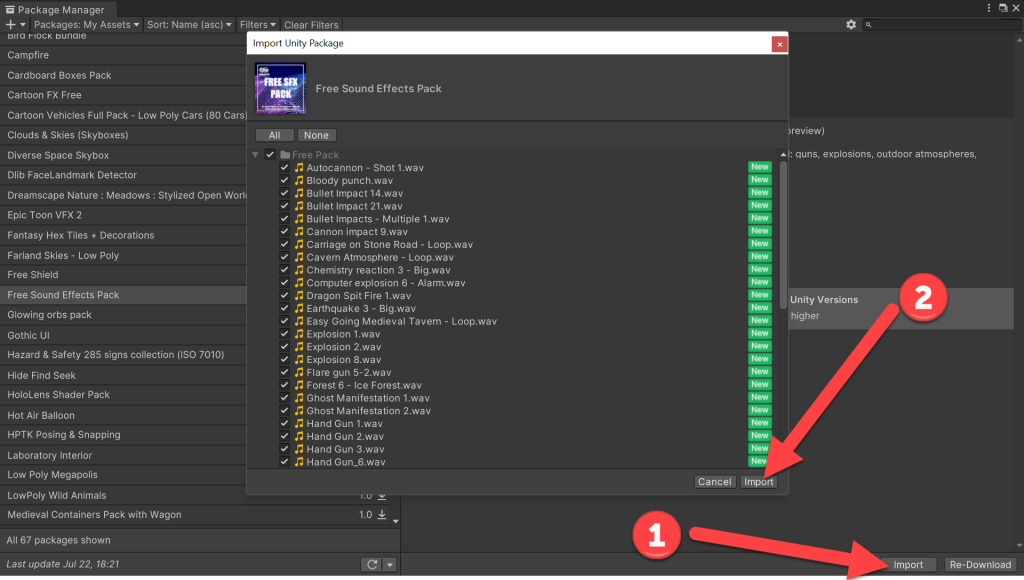
- (Package Manager) Do the same for Free Sound Effects Pack
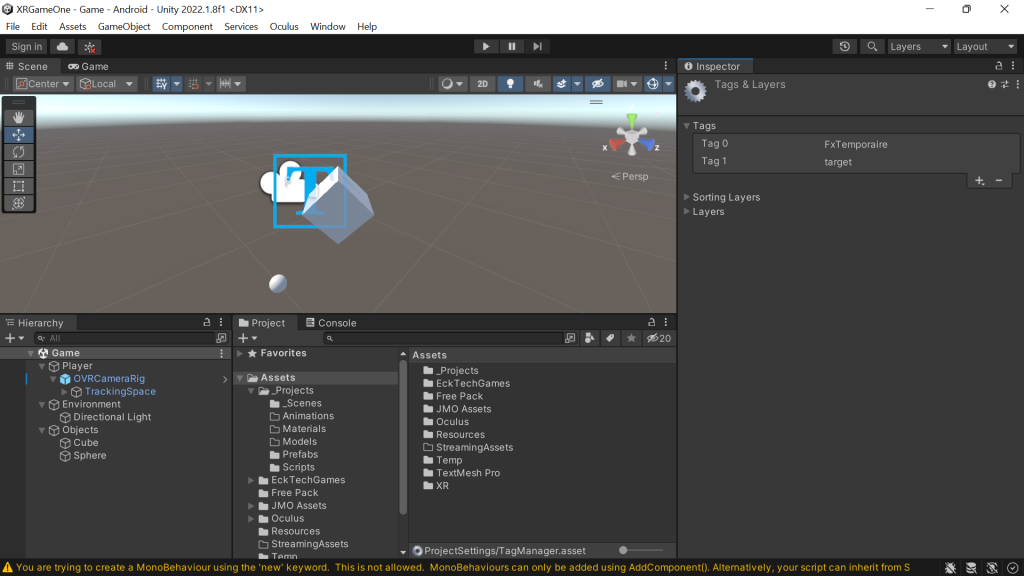
- (Hierarchy) Click Cube -> (Inspector) Click the drop down arrow for Tag -> Add Tag
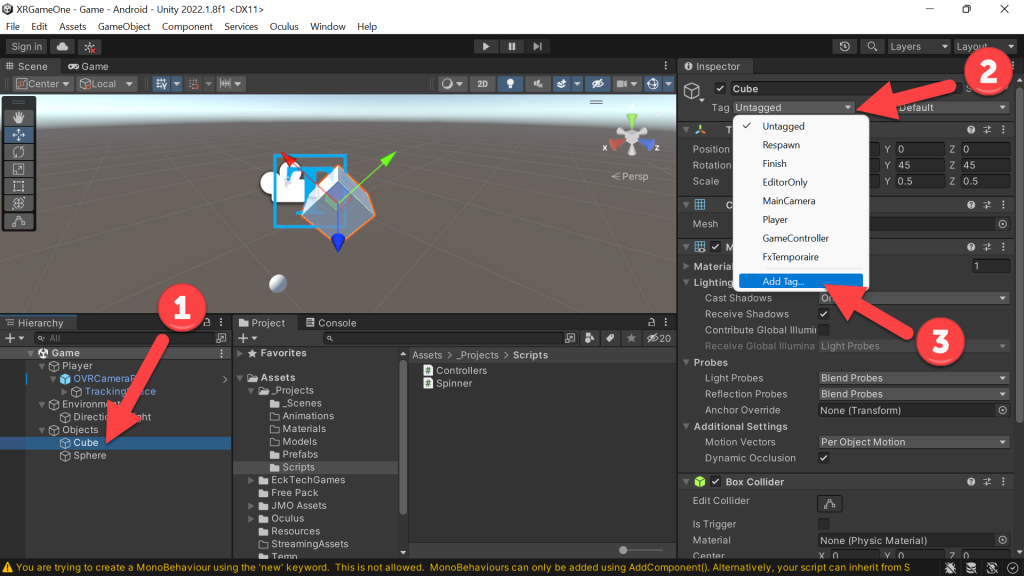
- (Inspector) Click the + -> Enter target and click Save
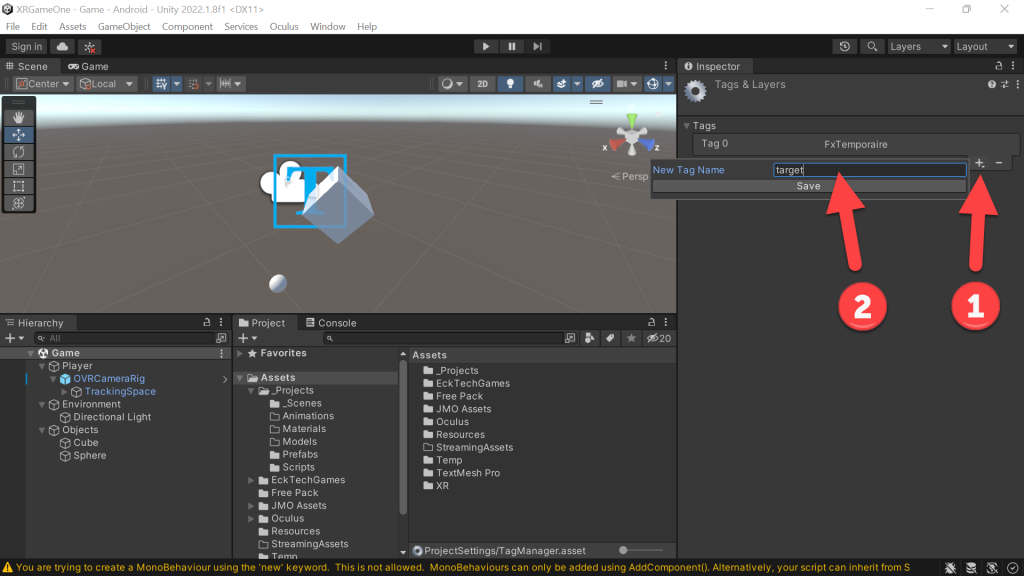
- This is what is should look like now… 🙂
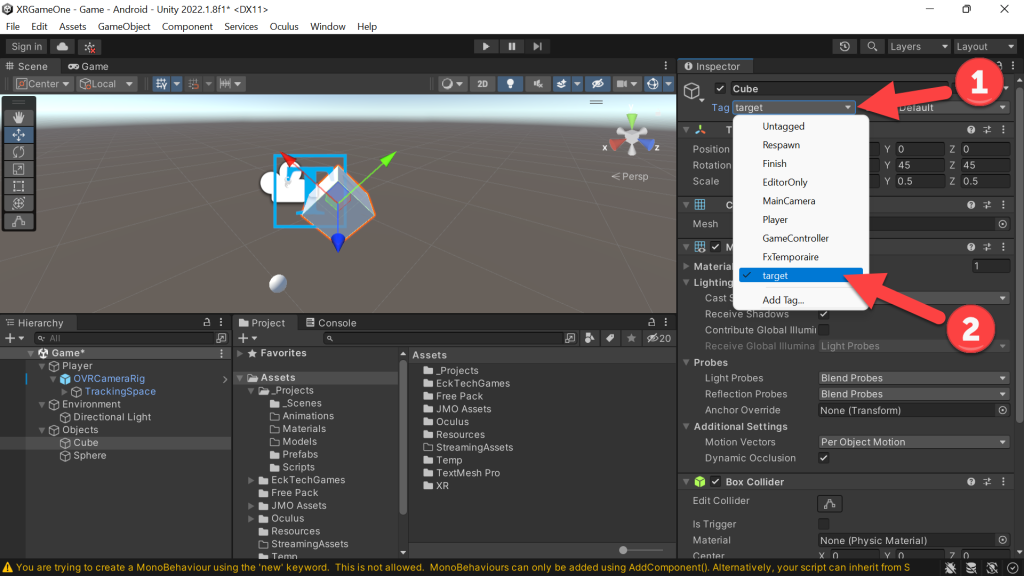
- You’d think it would automatically add the new tag wouldn’t you… nope <shrug>
- (Hierarchy) Click Cube -> (Inspector) Click the drop down arrow for Tag -> Choose target
- (Project) Scripts -> Double click Shoot script
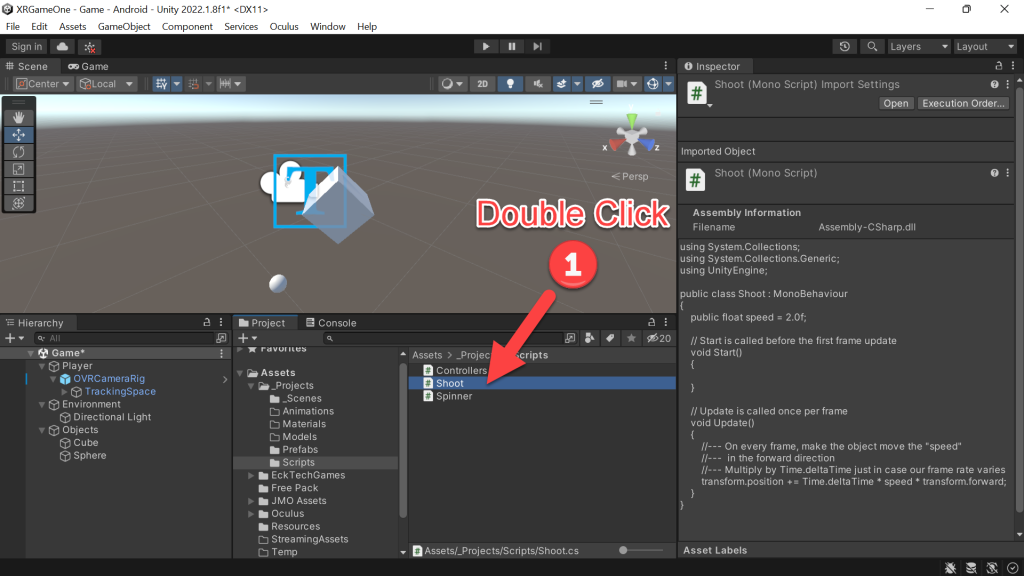
- (Visual Studio) Add the following to our Shoot script
public GameObject hitAnimation;
public AudioClip hitAudio;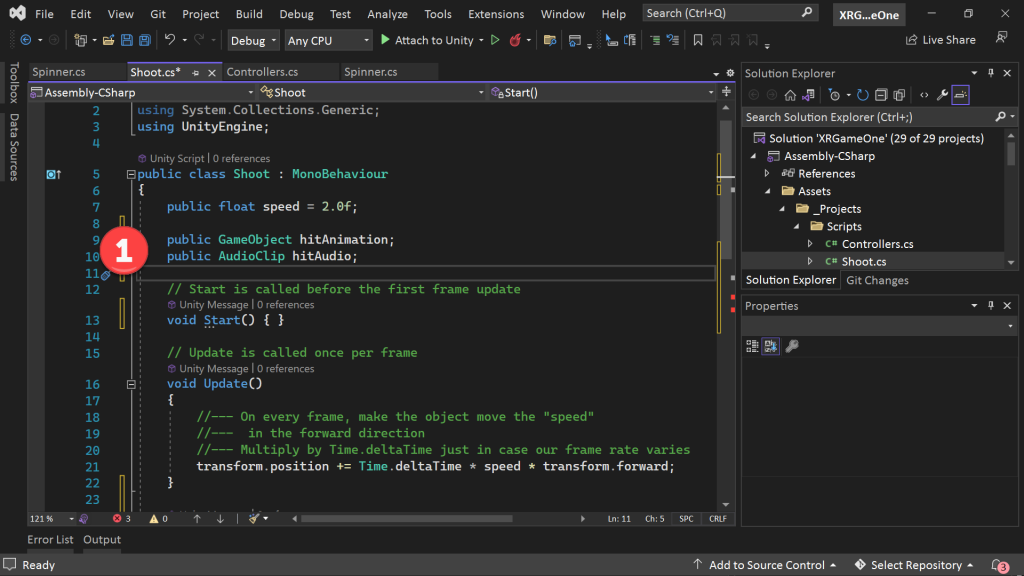
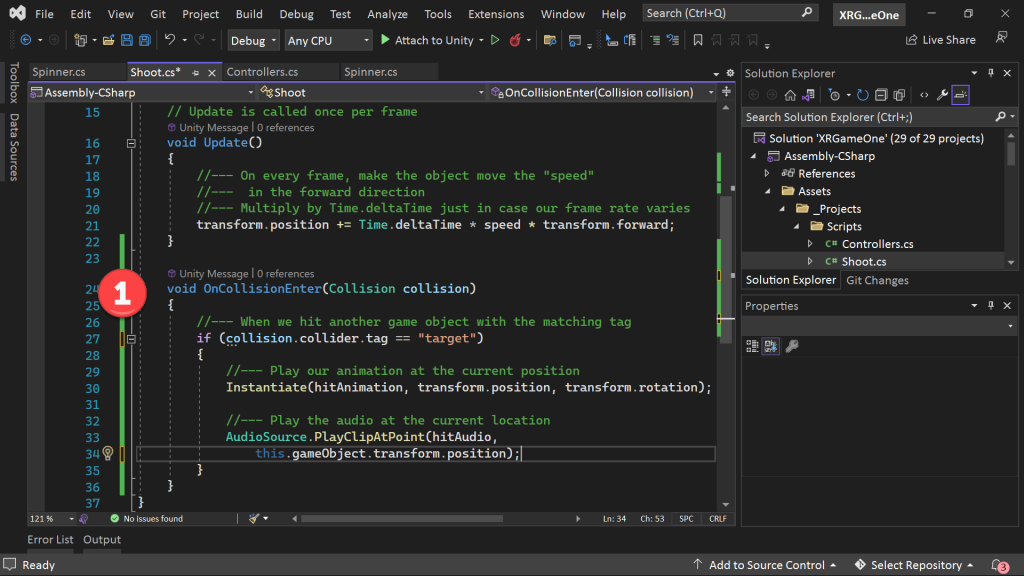
- (Visual Studio) Add the following to our Shoot script — under our Update() method
void OnCollisionEnter(Collision collision)
{
    //--- When we hit another game object with the matching tag
    if (collision.collider.tag == "target")
    {
        //--- Play our animation at the current position
        Instantiate(hitAnimation, transform.position, transform.rotation);

        //--- Play the audio at the current location
        AudioSource.PlayClipAtPoint(hitAudio,
            this.gameObject.transform.position);
    }
}
- So the above will (after we configure it in the following steps) will play the explosion animation and sound – but won’t destroy either the sphere or the cube — so if you want them to add the following — recommend trying it with and without the following so you can see what happens 🙂
//--- Make the object hitting disappear
Destroy(gameObject);

//--- Make the object that was hit disappear
Destroy(collision.gameObject);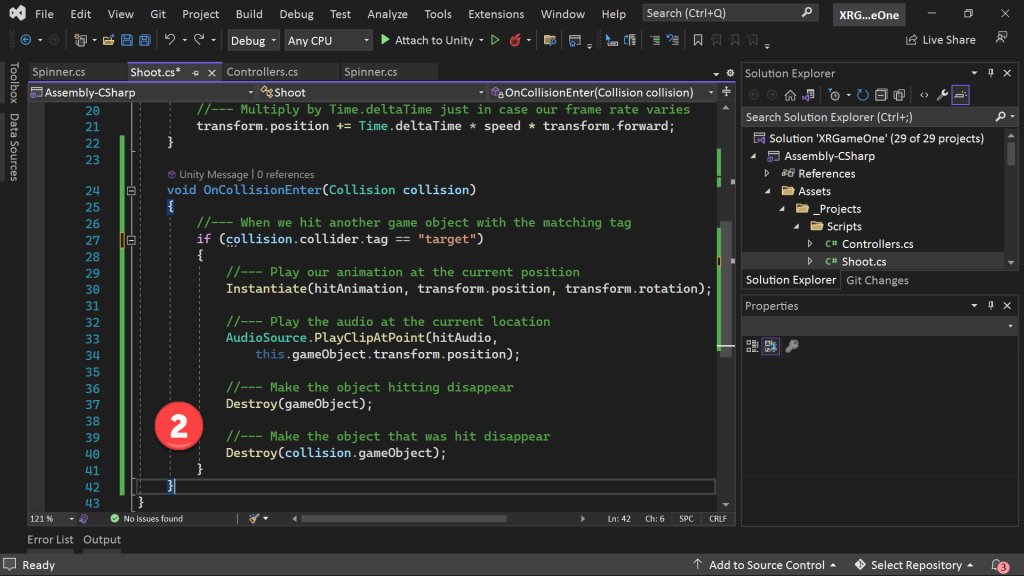
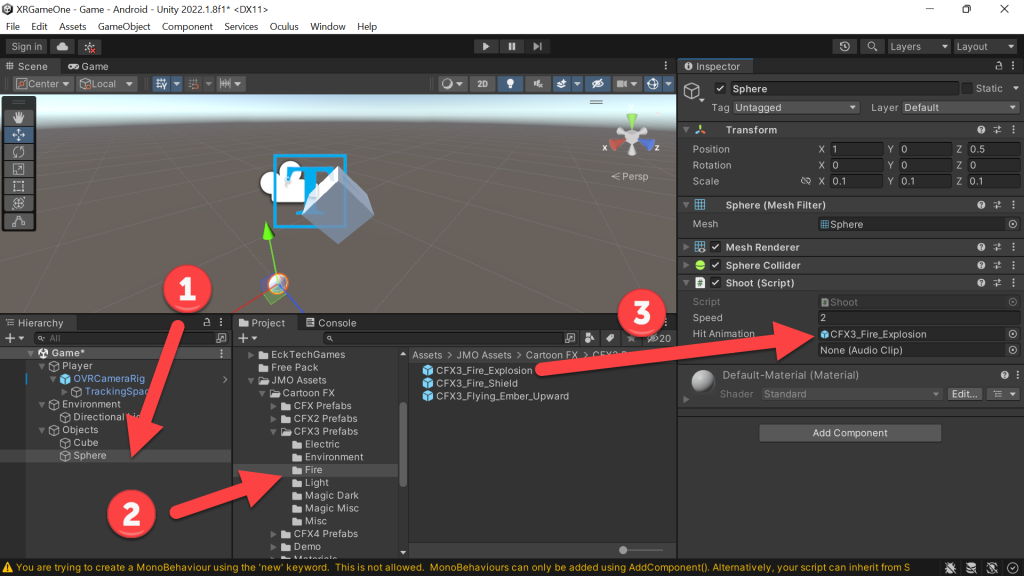
- (Inspector) Click on Sphere -> (Project) find the Fire folder, it’s under JMO Assets/Cartoon FX/CFX3 Prefabs/Fire -> drag CFX_Fire_Explosion to (Inspector) Hit Animation
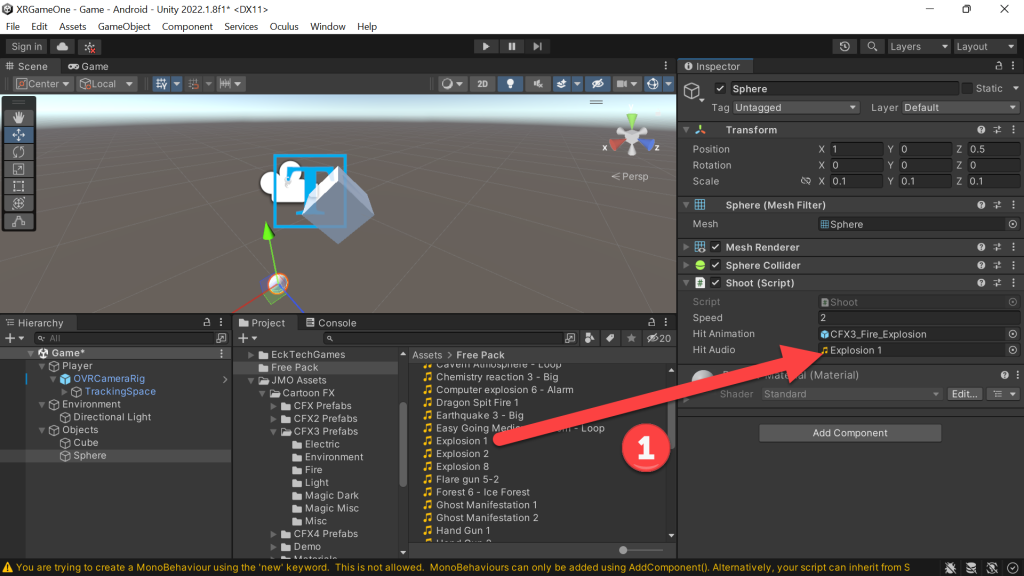
- (Project) find the Free Pack folder -> drag Explosion 1 to (Inspector) Hit Audio
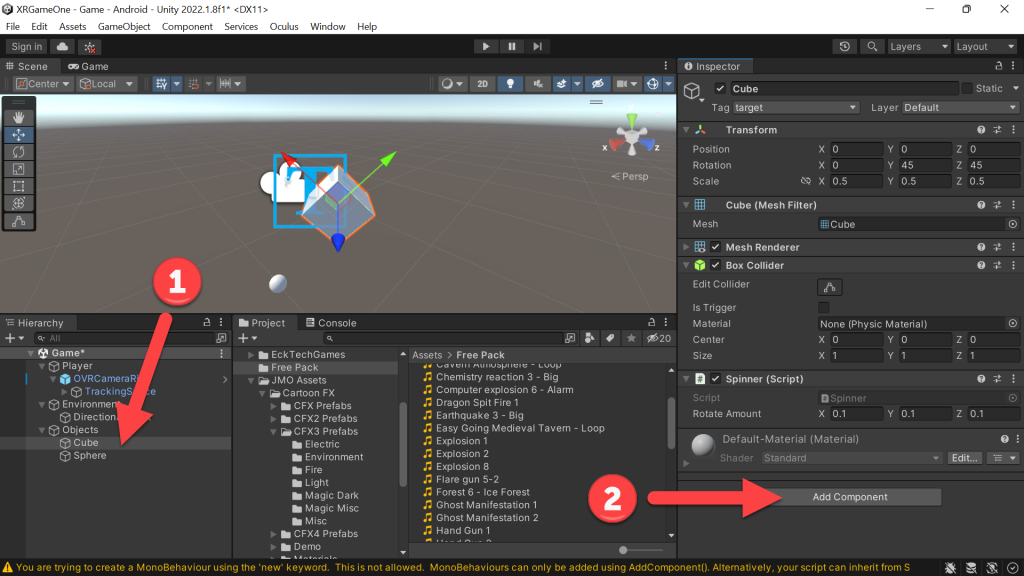
- (Hierarchy) Click Cube -> (Inspector) Add Component
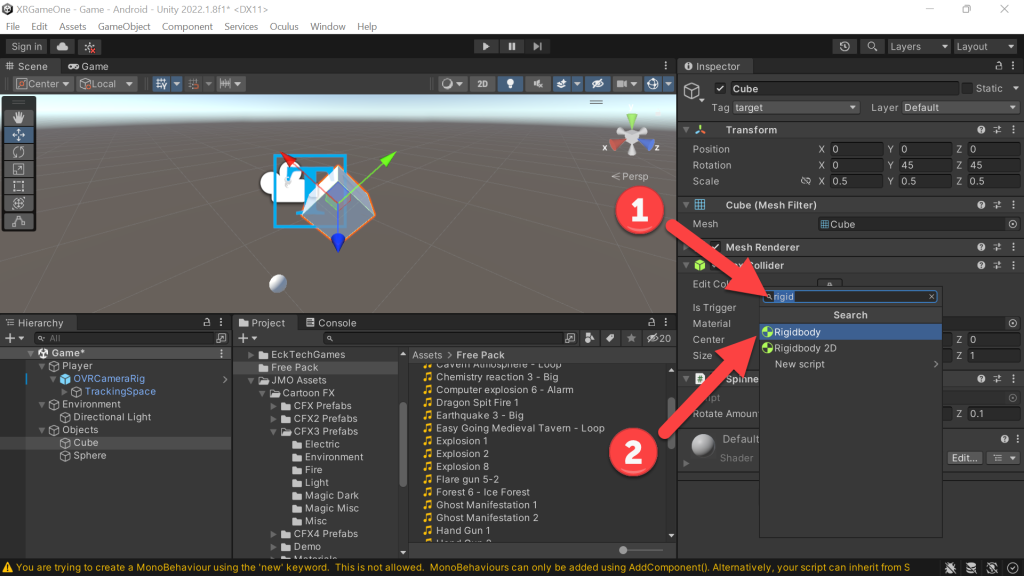
- (Inspector) Search for RigidBody and add it
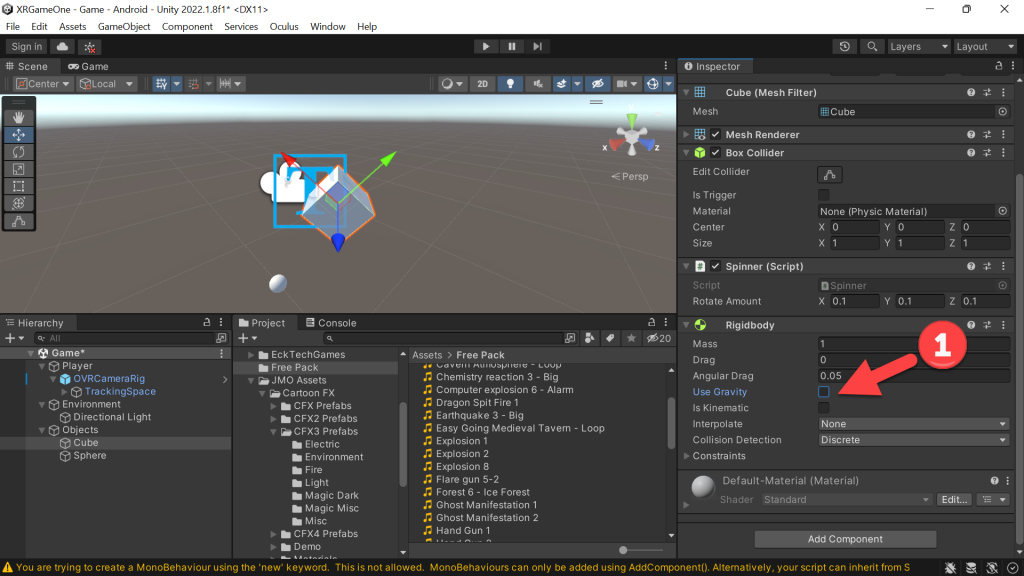
- (Inspector) In RigidBody -> Uncheck Use Gravity
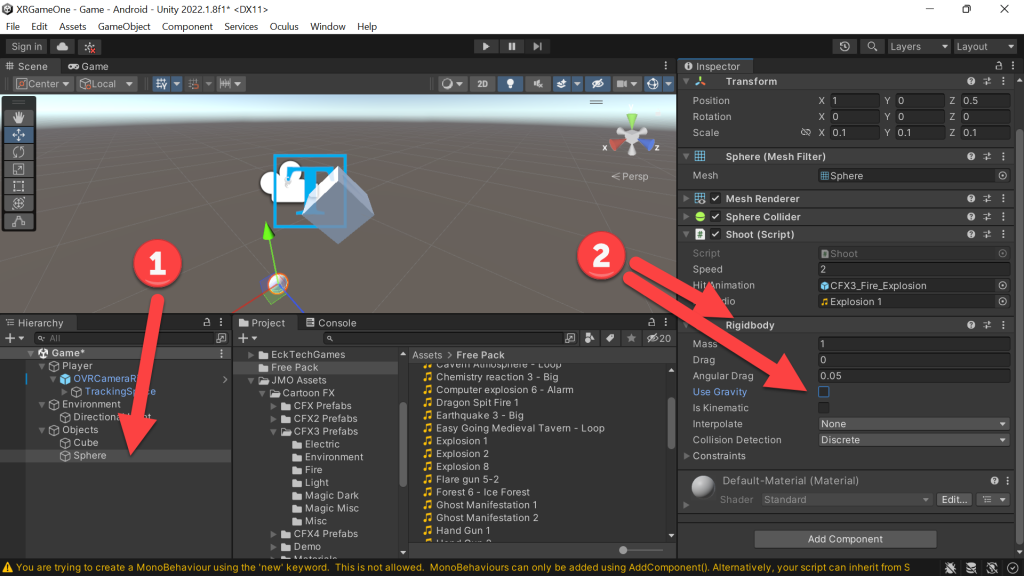
- (Hierarchy) Click Sphere -> Just like above add a RigidBody -> Uncheck Use Gravity
- Now, it’s super cool to blow up one target — but what if we wanted to create 20 randomly placed cubes around un within a certain distance??? Easy, try this… 🙂
- (Project) Double Click on Controllers script -> (Visual Studio) Add the following code…
public GameObject objectTarget;
public float distanceFromPlayer = 10f;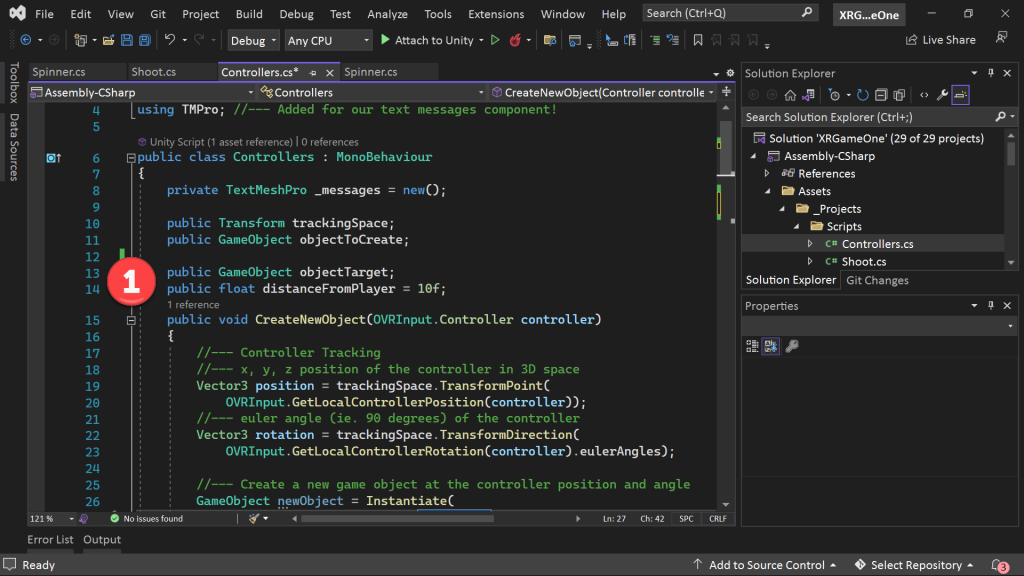
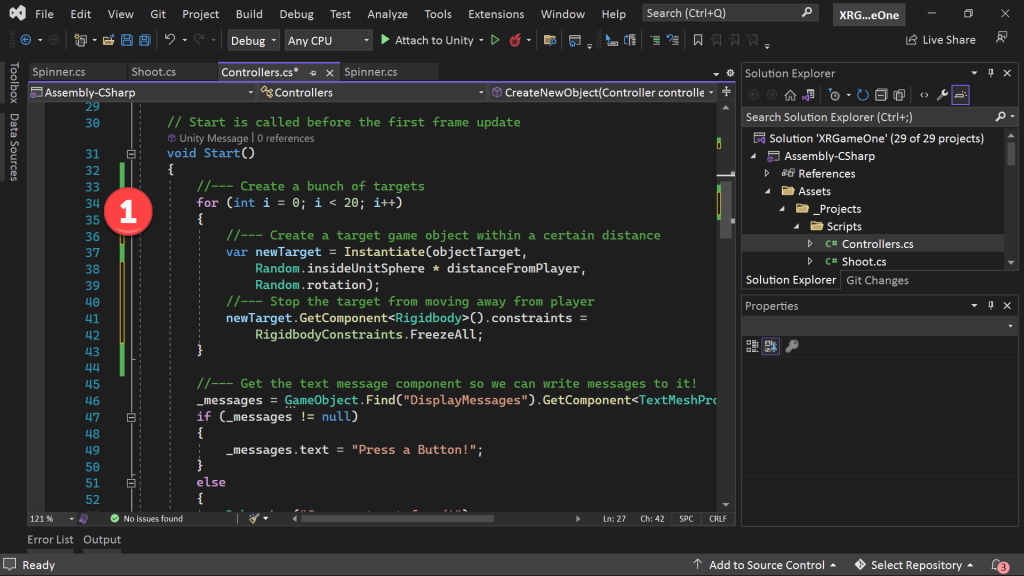
- (Visual Studio) In the Start() method -> Add the following code…
//--- Create a bunch of targets
for (int i = 0; i < 20; i++)
{
    //--- Create a target game object within a certain distance
    var newTarget = Instantiate(objectTarget,
        Random.insideUnitSphere * distanceFromPlayer,
        Random.rotation);
    //--- Stop the target from moving away from player
    newTarget.GetComponent<Rigidbody>().constraints =
        RigidbodyConstraints.FreezeAll;
}
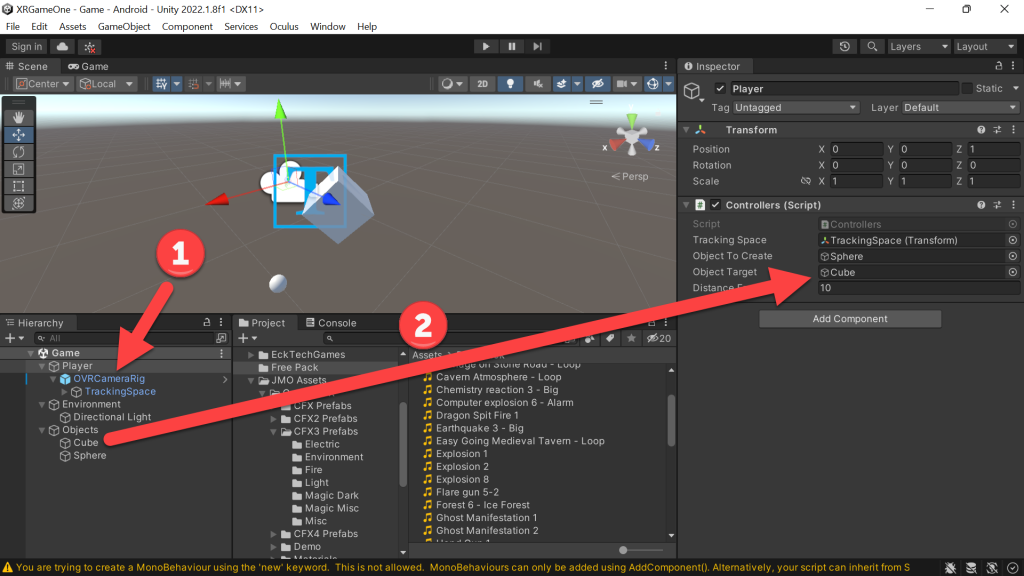
- (Hierarchy) Click Player -> (Inspector) Drag Cube to Object Target
- Wow! You did it… Now try going back and changing the explosion animations and sounds!
- Bonus points if you go back to the Unity Asset store and download other game objects that you can add instead of shooting of cubes… Try busting up crates of something else very common — maybe…
- https://assetstore.unity.com/packages/3d/props/exterior/crates-and-barrels-pack-volume-1-free-version-128829
- https://assetstore.unity.com/packages/3d/props/food/simple-foods-207032


