Virtual and Augmented Reality together are now referred to as XR or “Extended-Reality”.
You’re in the right place at the right time to build something amazing in XR!
XR applications can be created in Unity for many devices, our focus will be on Microsoft Hololens 2 and the Meta Quest
In this blog post series we will focus on Meta Quest!
Check out other blog articles in this (and other) series!
Quick links to Lance’s latest XR Step-by-Step blog articles by device
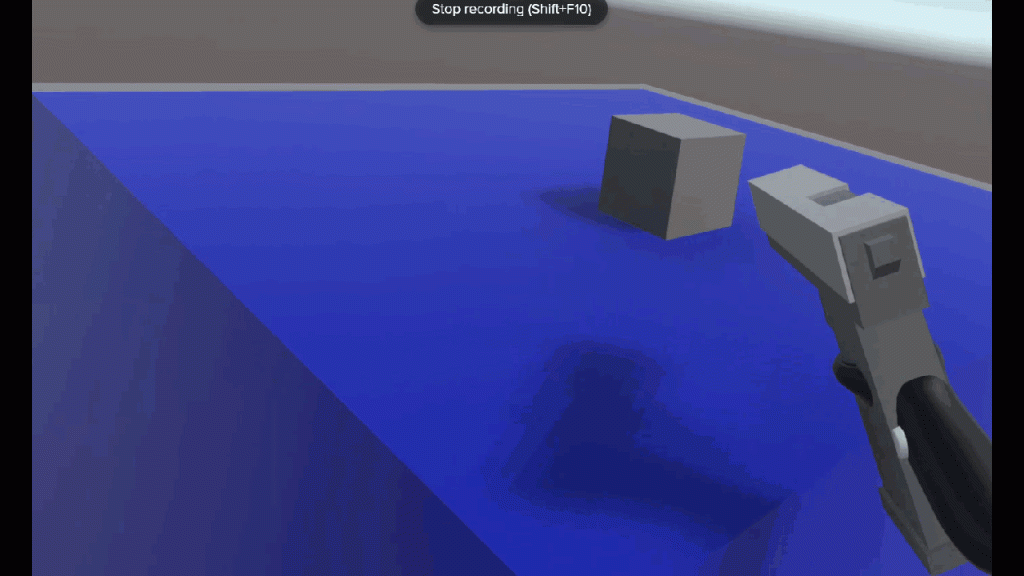
Our pistol shoots!
Now let’s make it sound and look like you’re actually shooting it by adding sound and animations!
Full Step-by-Step Instructions!
Goals…
- Downloading Assets
- Customizing Pistol Script

Download the finished code for this blog article @ Github Repo
Downloading Assets
- So you embark on something very dangerous for those of us that like to collect things…
- Unity Assets! They’re addictive and there are SOOO many to choose from.
- Many of them are FREE or very reasonably priced – and would take me much much longer to make than to support those that make them for me to add to my XR experiences. Have fun!
- Open the Unity Asset store – https://assetstore.unity.com/
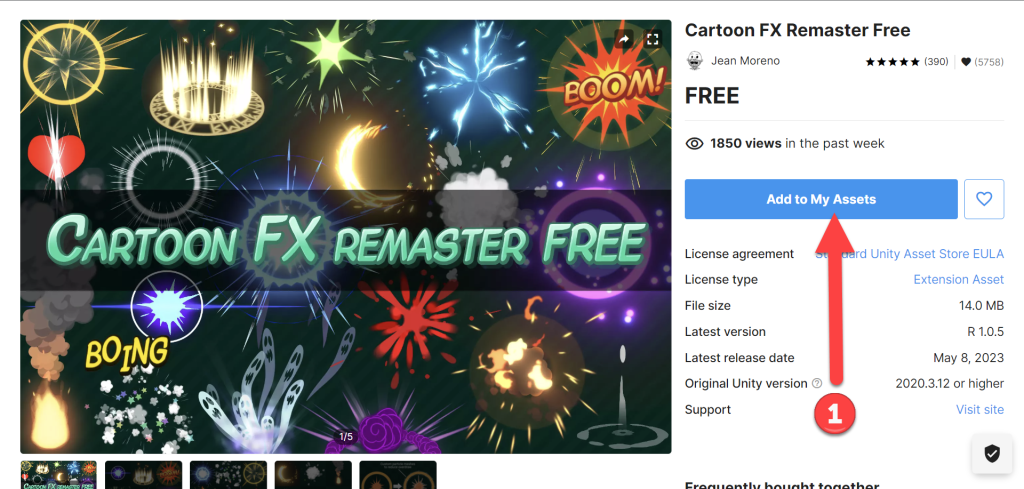
- One of my favorite FREE animation asset packs is Cartoon FX Remaster Free
- Click Add to My Assets
- It will have you login with your Unity account if you haven’t already
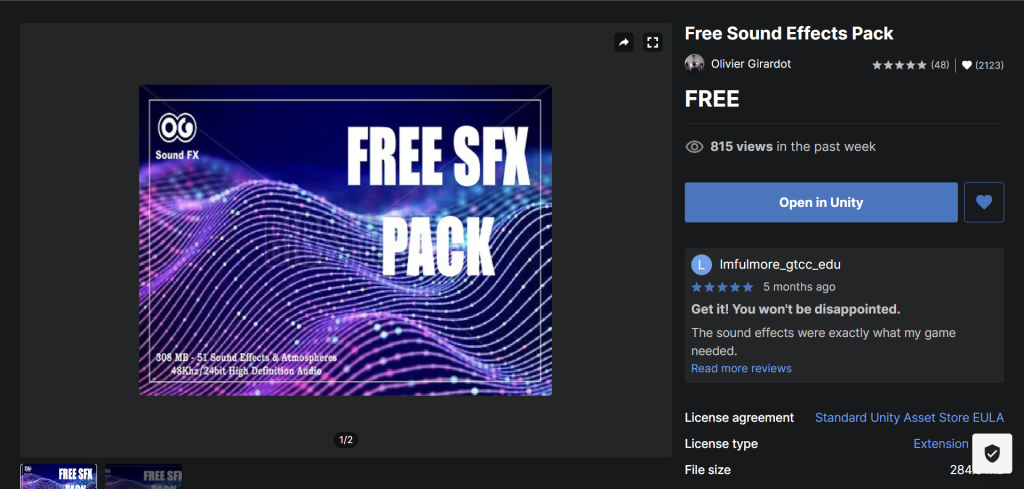
- Now we need some sounds… another one of my favorite FREE asset packs is FREE SFX PACK
- Click Add to My Assets
- Now lets add them to our XR experience!
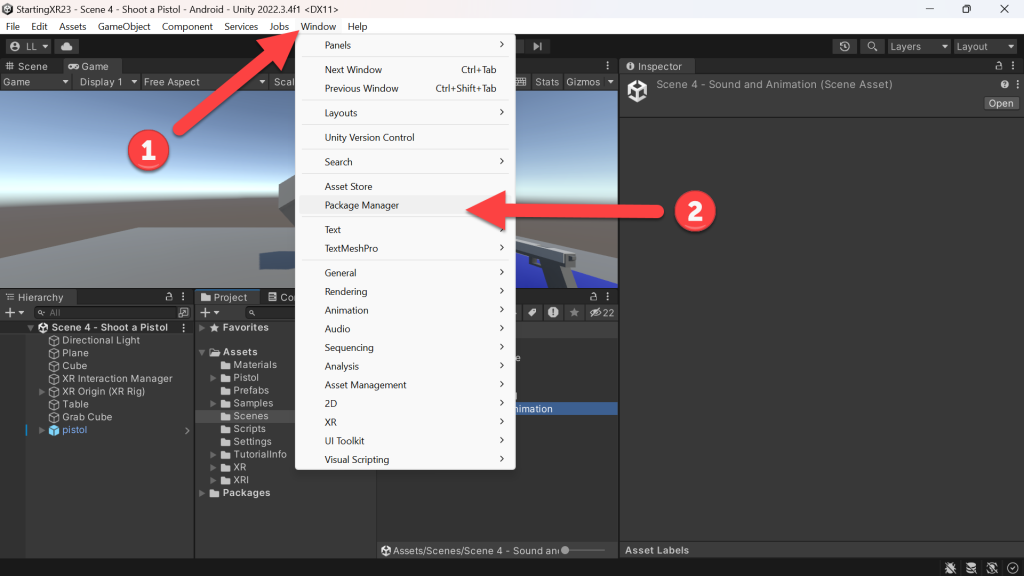
- (Toolbar) Click Window
- Click Package Manager
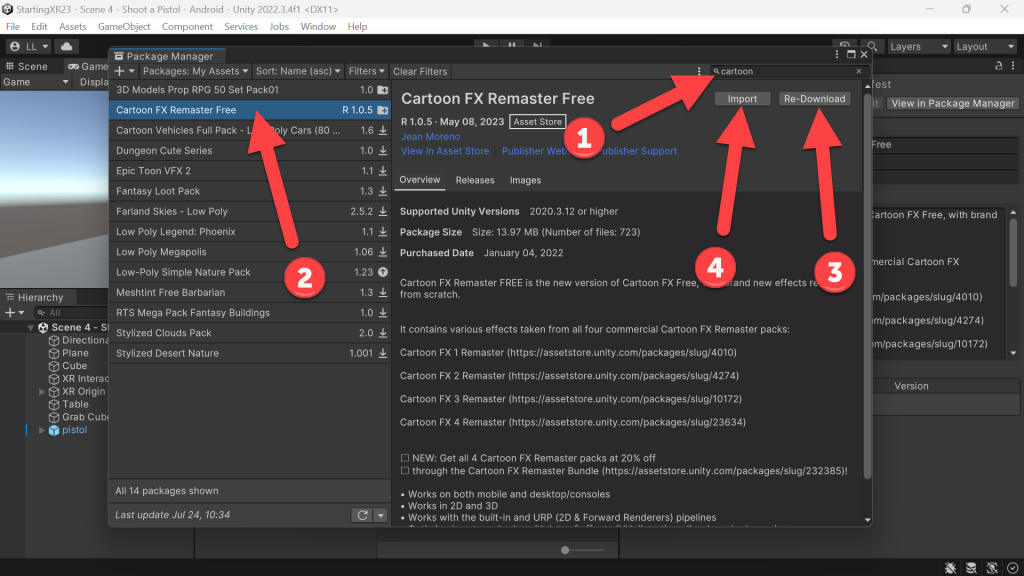
- (Package Manager Search) Type cartoon
- (Package Manager) Click Cartoon FX Remaster Free
- Click Download
- Click Import
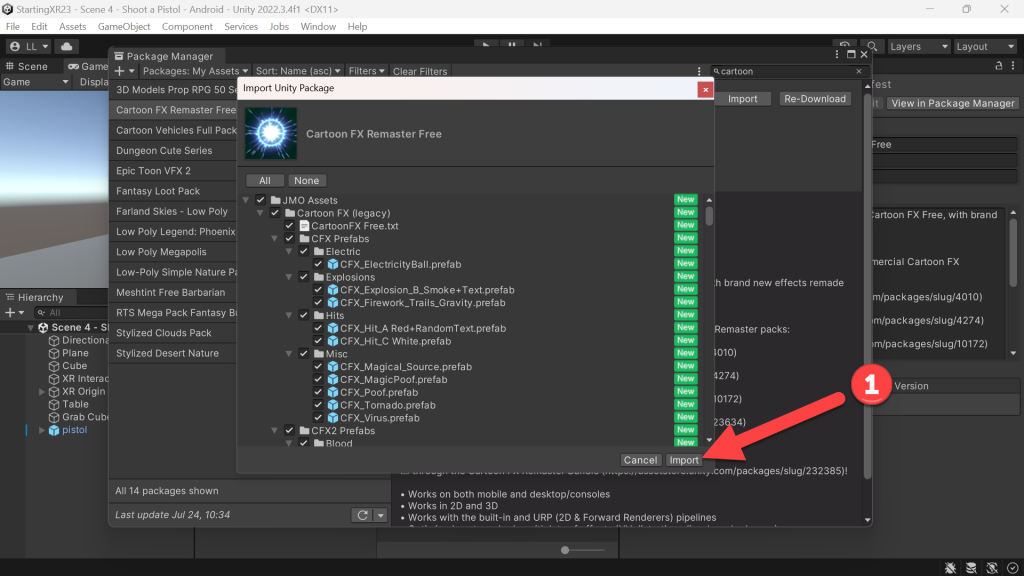
- (Import Unity Package) Click Import
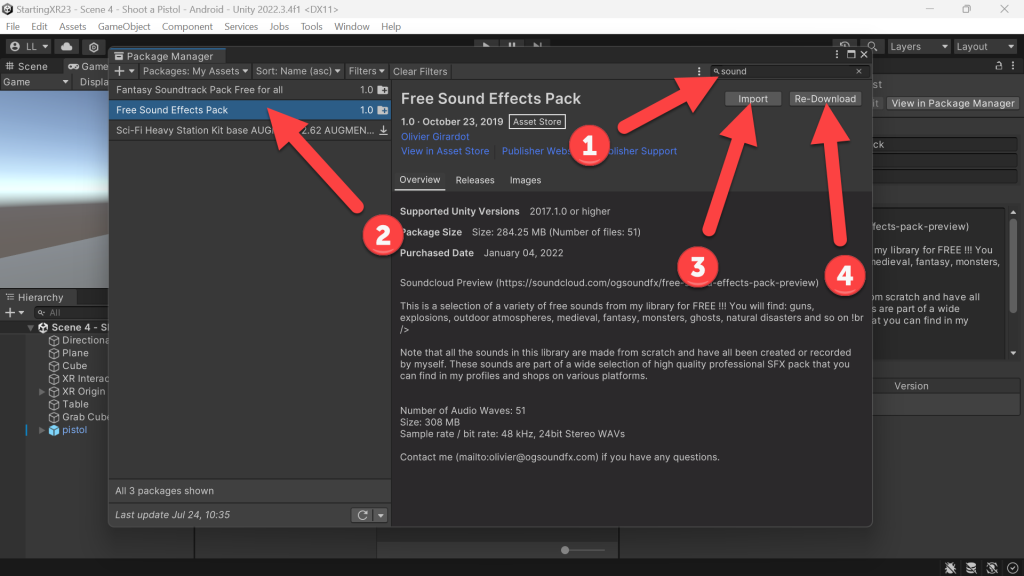
- (Package Manager Search) Type sound
- (Package Manager) Click Free Sound Effects Pack
- Click Download
- Click Import
- (Import Unity Package) Click Import

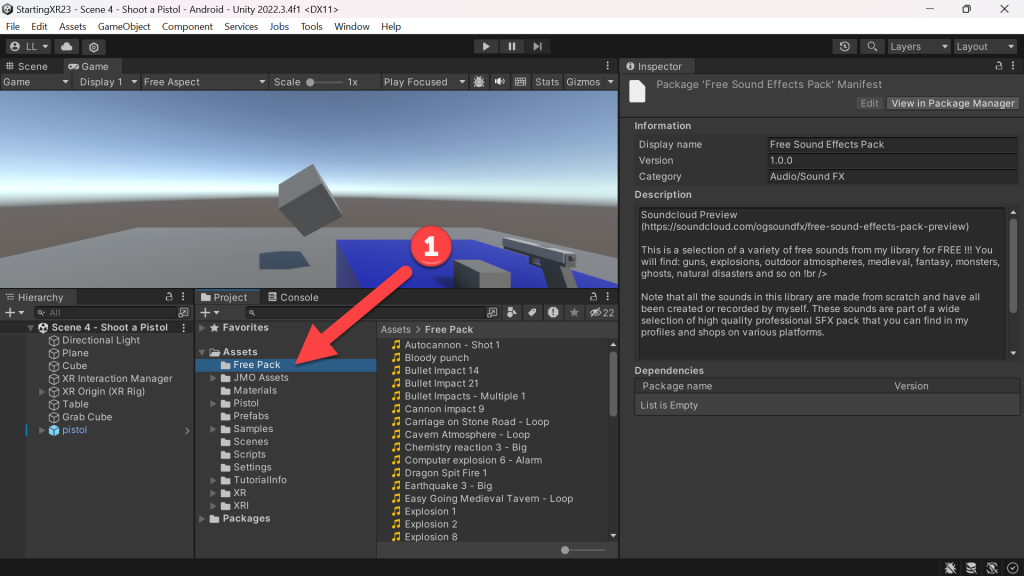
- (Project) Click Free Pack folder -> Just to see what Sounds we installed!
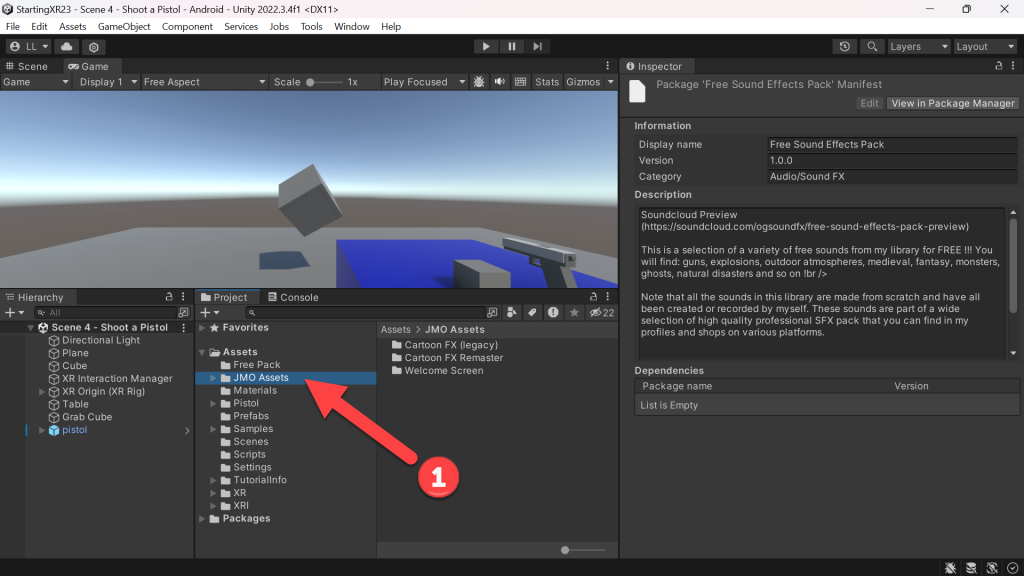
- (Project) Click JMO Assets folder -> Just to see what Animations we installed!
Customizing Pistol Script
- Ok, so let’s add sound and animation every time we pull the trigger on the pistol.
- (Project) Click Scripts folder
- Double-Click Pistol script
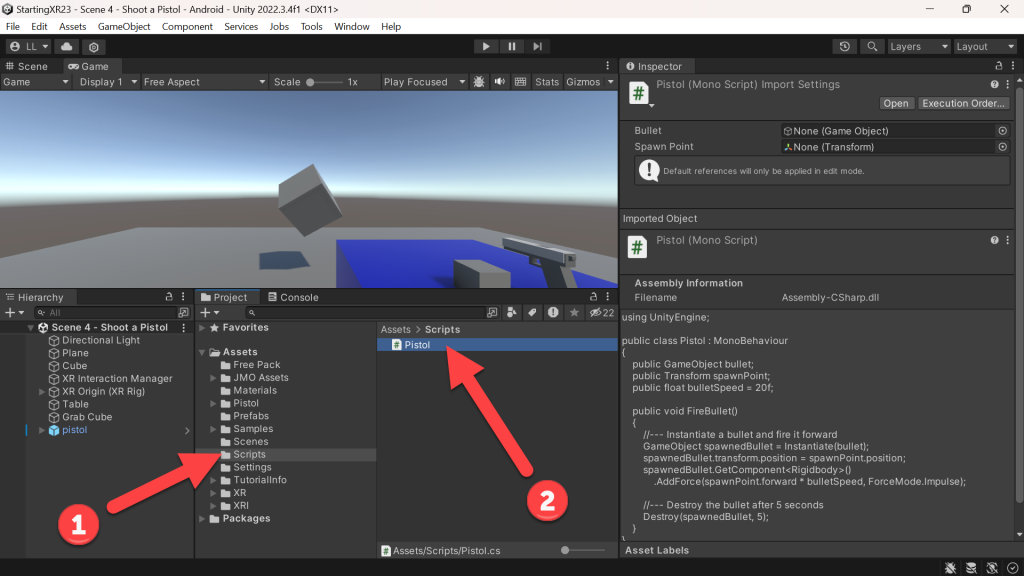
- Add public fields for an audio and animation!
- Code allows us to play the animation at our
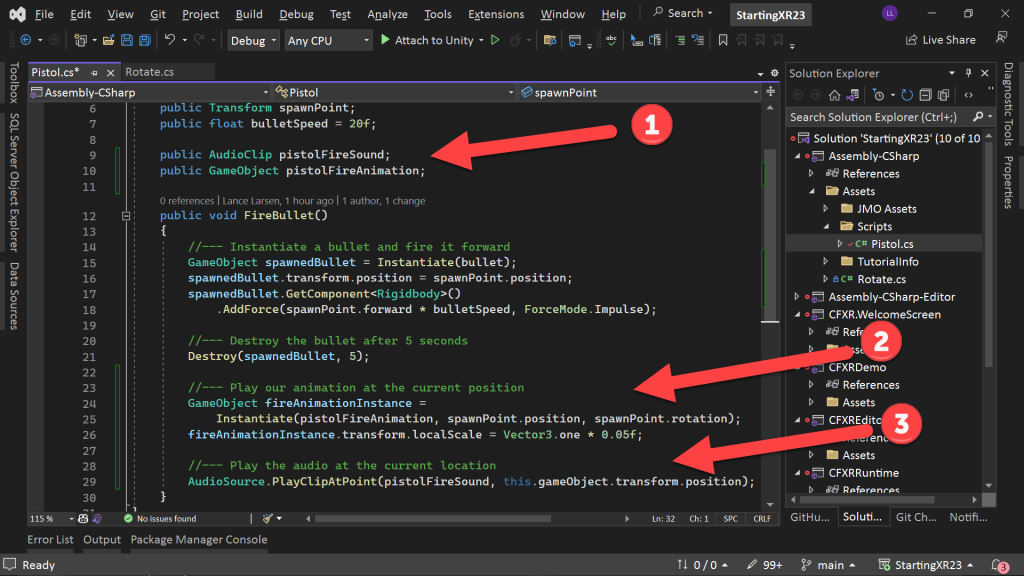
using UnityEngine;

public class Pistol : MonoBehaviour
{
    public GameObject bullet;
    public Transform spawnPoint;
    public float bulletSpeed = 20f;

    public AudioClip pistolFireSound;
    public GameObject pistolFireAnimation;

    public void FireBullet()
    {
        //--- Instantiate a bullet and fire it forward
        GameObject spawnedBullet = Instantiate(bullet);
        spawnedBullet.transform.position = spawnPoint.position;
        spawnedBullet.GetComponent<Rigidbody>()
            .AddForce(spawnPoint.forward * bulletSpeed, ForceMode.Impulse);

        //--- Destroy the bullet after 5 seconds
        Destroy(spawnedBullet, 5);

        //--- Play our animation at the current position
        GameObject fireAnimationInstance =
            Instantiate(pistolFireAnimation, spawnPoint.position, spawnPoint.rotation);
        fireAnimationInstance.transform.localScale = Vector3.one * 0.05f;

        //--- Play the audio at the current location
        AudioSource.PlayClipAtPoint(pistolFireSound, this.gameObject.transform.position);
    }
}
- Now we just need to add what sound and animation we want… I found a couple that I like – but I encourage you to experiment!
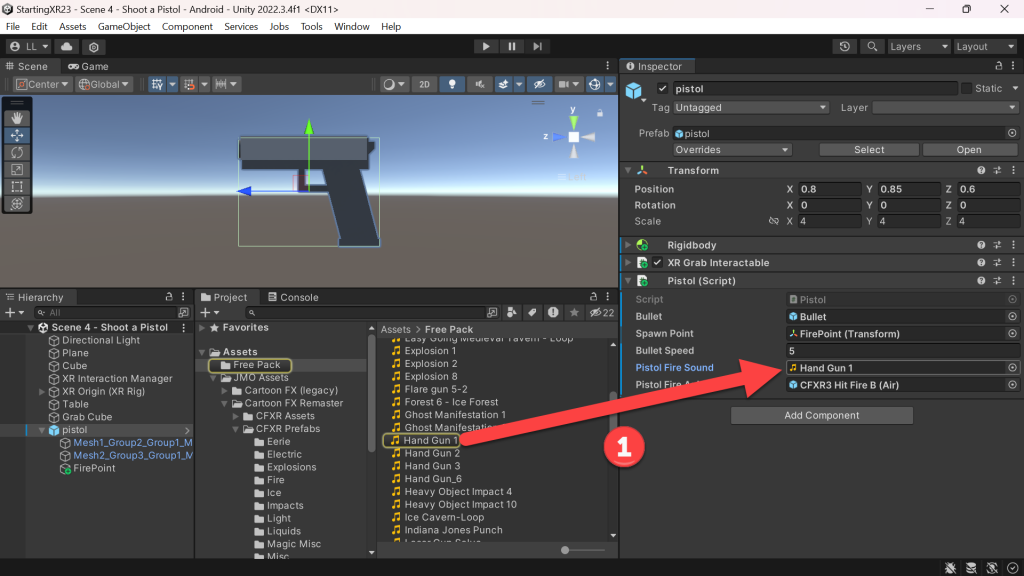
- (Project) Click Free Pack folder -> Drag Hand Gun 1 to the Pistol Fire Sound field
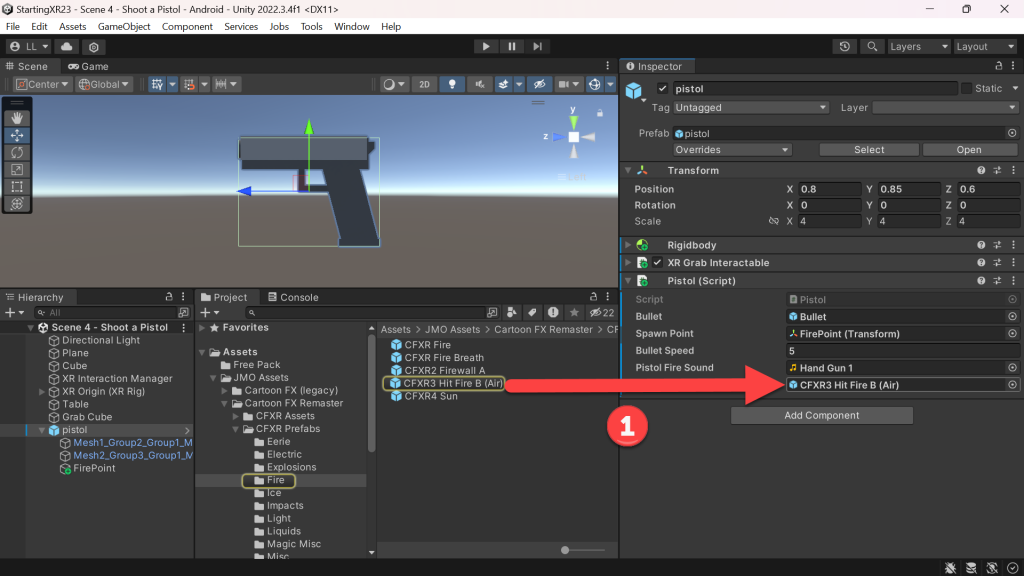
- (Project) Click JMO Assets folder -> Drag CSXR3 Hit Fire B (Air) to the Pistol Fire Animation field
- Build and Run!
- That looks pretty awesome, much more realistic for our XR experience 🙂

I always love feedback and suggestions for new XR / AI blog posts!
Go build something amazing in XR & AI! — Lance 🙂
Check out other blog articles in this (and other) series!
Quick links to Lance’s latest XR Step-by-Step blog articles by device

One thought on “XR Step-by-Step 2023! Meta Quest: Sound and Animations! Unity 2022 + Open XR + XR Interaction Toolkit”