Virtual and Augmented Reality together are now referred to as XR or “Extended-Reality”. You’re in the right place at the right time to build something amazing in XR!
XR applications can be created in Unity for many devices, our focus will be on Microsoft Hololens and the Meta Quest 2 – in this blog post series we will specifically focus on Meta Quest 2 in the latest Unity 2022.
We’ve made a ton of progress so far in creating your XR experience! Now we want to be able to start interacting with our XR environment – so let’s add our Quest Touch controllers to our project!
Here’s my XR Step-by-Step blog series to help you create your XR experiences!
Unity 2022
1) Installing the Tools you need for XR development == Unity 2022
2) Setting up your Meta Quest XR project in Unity 2022!
3) Helpful Asset Packages & Libraries for Unity 2022
4) Organizing your Unity Projects
5) Setting up Mixed-Reality Passthrough for your Meta Quest XR project in Unity 2022!
6) Setting up Touch Controller for your Oculus Quest XR project in Unity 2022!
Unity 2021
1) Installing the Tools you need for XR development == Unity 2021
2) Setting up your Oculus Quest XR project in Unity 2021!
3) Setting up Mixed-Reality Passthrough for your Oculus Quest XR project in Unity 2021!
4) Keep your XR project safe with a GitHub Code Repo!
5) Setting up Touch Controller for your Oculus Quest XR project in Unity 2021!
6) Coding your Touch Controller for your Oculus Quest XR project in Unity 2021!
Quick Reference summary of all steps to add controllers for your XR project, followed by the detailed Step-by-Step with images!
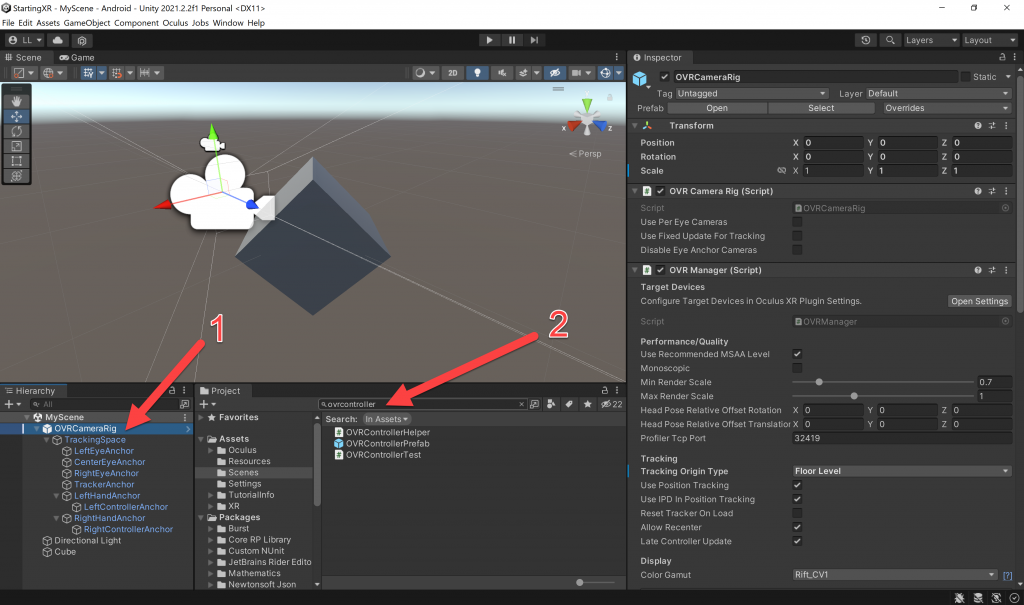
- (Hierarchy) Click on OVRCameraRig -> expand to see LeftHandAnchor and RightHandAnchor
- (Project Search Bar) Type OVRControllerPrefab
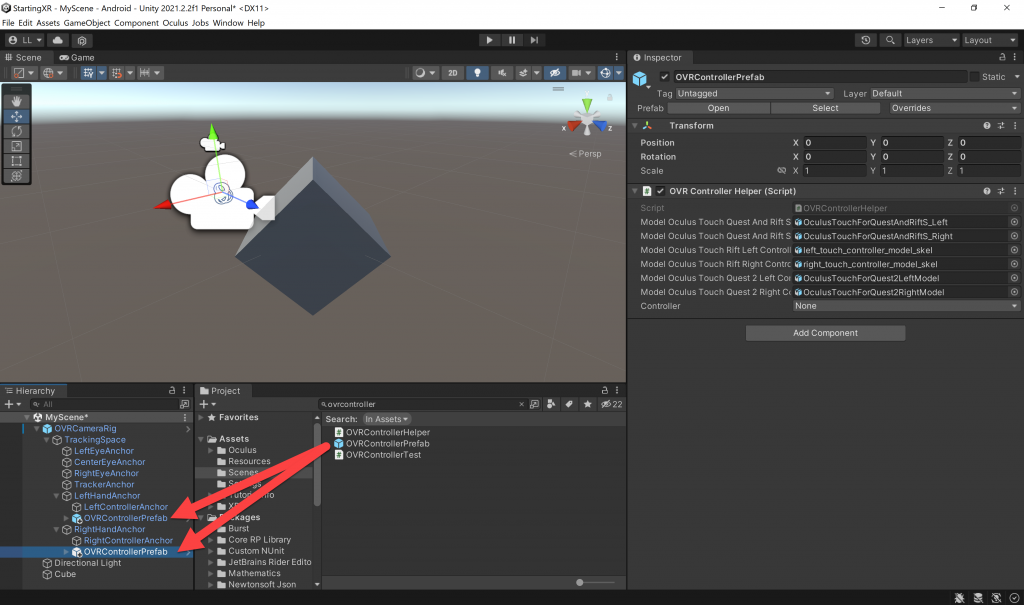
- (Project) Drag the OVRControllerPrefab to both the LeftHandAnchor and the RightHandAnchor
- (Hierarchy) OVRCameraRig -> TrackingSpace
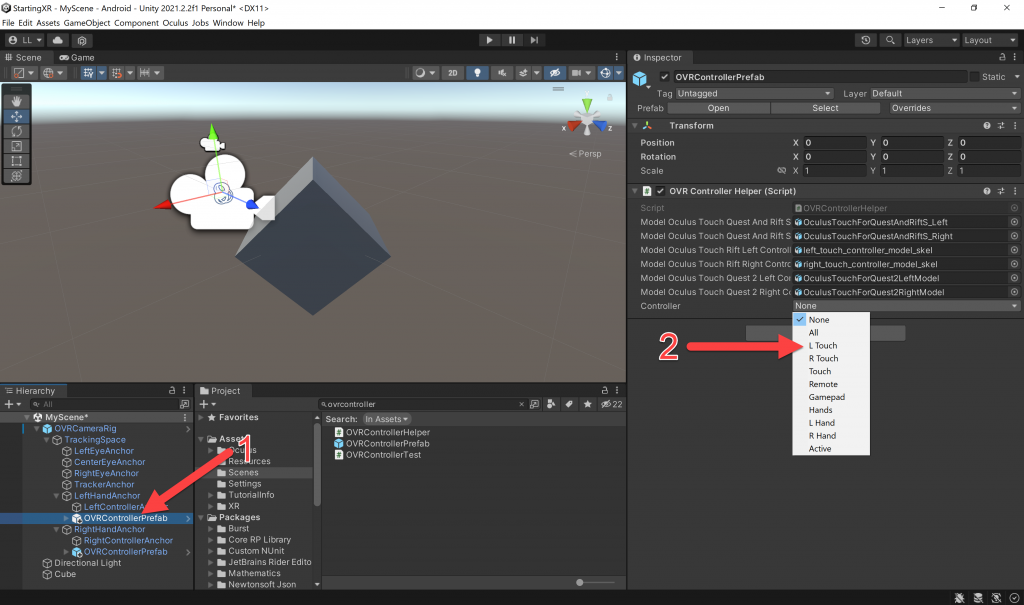
- LeftHandAnchor -> Click the OVRControllerPrefab
- (Inspector) OVR Controller Helper (Script) -> (Controller) Choose L Touch
- RightHandAnchor -> Click the OVRControllerPrefab
- (Inspector) OVR Controller Helper (Script) -> (Controller) Choose R Touch
- LeftHandAnchor -> Double click OVRControllerPrefab – will see controllers!
Full Step-by-Step Instructions!
- (Hierarchy) Click on OVRCameraRig -> expand to see LeftHandAnchor and RightHandAnchor
- (Project Search Bar) Type OVRControllerPrefab
- (Project) Drag the OVRControllerPrefab to both the LeftHandAnchor and the RightHandAnchor
- (Hierarchy) OVRCameraRig -> TrackingSpace
- LeftHandAnchor -> Click the OVRControllerPrefab
- (Inspector) OVR Controller Helper (Script) -> (Controller) Choose L Touch
- RightHandAnchor -> Click the OVRControllerPrefab
- (Inspector) OVR Controller Helper (Script) -> (Controller) Choose R Touch
- (Hierarchy) OVRCameraRig -> TrackingSpace
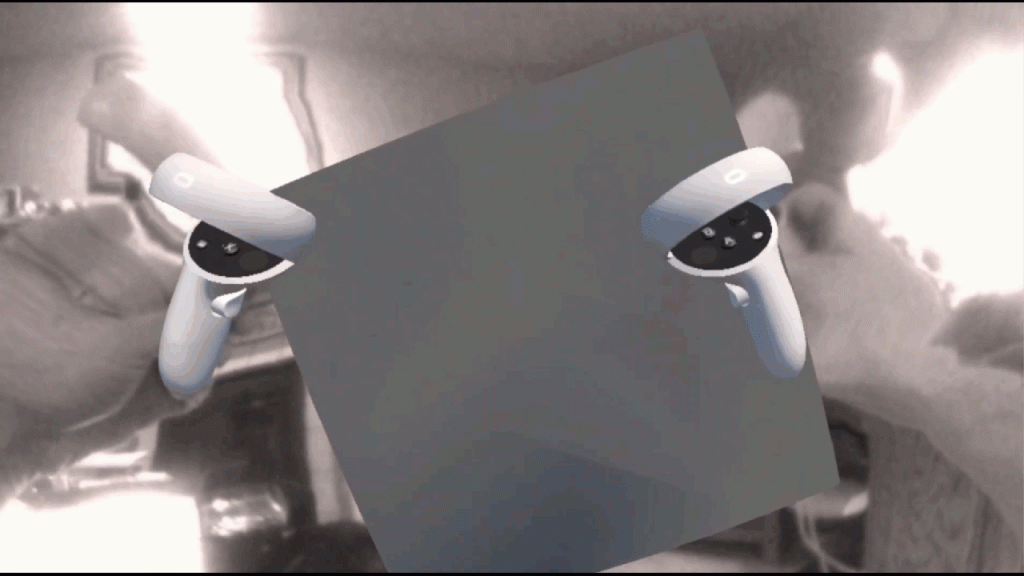
- LeftHandAnchor -> Double click OVRControllerPrefab – will see controllers!
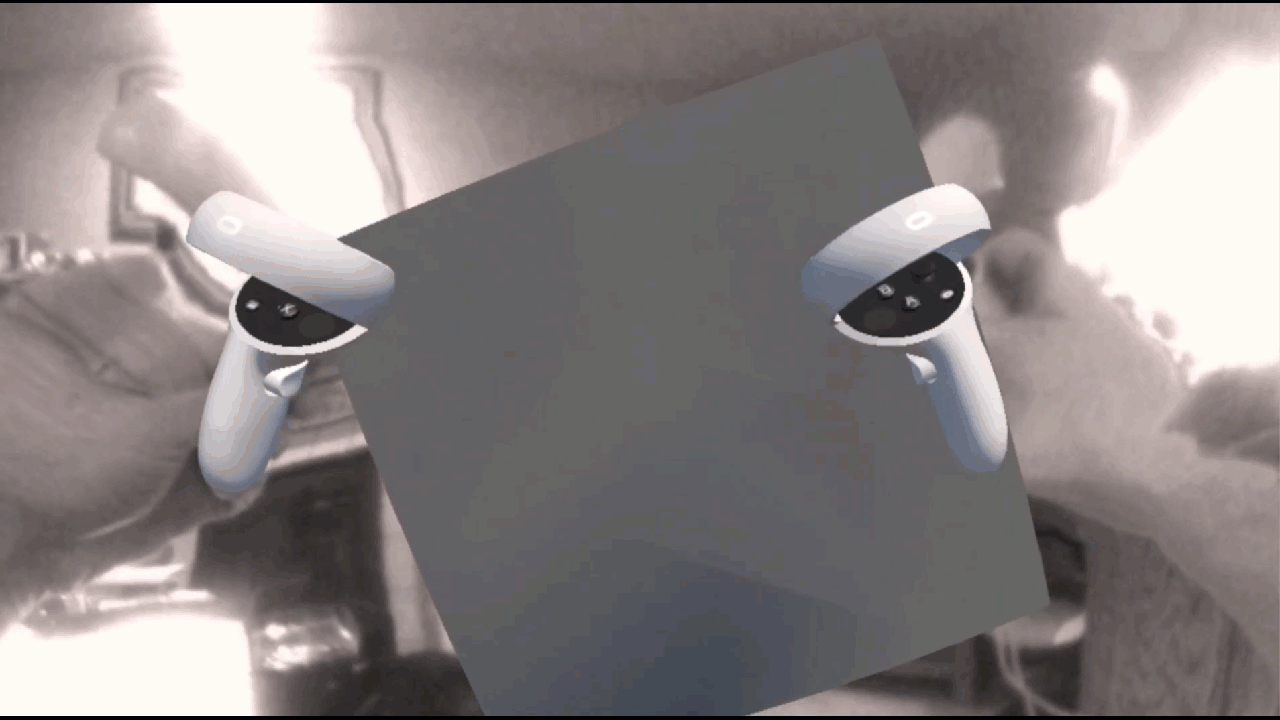
- Run your project and you should see beautiful controllers showing up — that are synchronized to the real controllers! Sweeeeet…
Love any feedback and see you in future XR blog posts.
Build something amazing in XR! — Lance
Here’s my XR Step-by-Step blog series to help you create your XR experiences!
1) Installing the Tools you need for XR development == Unity 2021
2) Setting up your Oculus Quest XR project in Unity 2021!
3) Setting up Mixed-Reality Passthrough for your Oculus Quest XR project in Unity 2021!
4) Keep your XR project safe with a GitHub Code Repo!
5) Setting up Touch Controller for your Oculus Quest XR project in Unity 2021!
6) Coding your Touch Controller for your Oculus Quest XR project in Unity 2021!


One thought on “XR Step-by-Step! Setting up Touch Controller for your Oculus Quest XR project in Unity 2022!”