Virtual and Augmented Reality together are now referred to as XR or “Extended-Reality”.
You’re in the right place at the right time to build something amazing in XR!
XR applications can be created in Unity for many devices, our focus will be on Microsoft Hololens 2 and the Meta Quest
In this blog post series we will focus on Meta Quest!
Check out other blog articles in this (and other) series!
Quick links to Lance’s latest XR Step-by-Step blog articles by device
Our XR experience is looking very professional, but we need things to target… and of course – to blow things up!
Full Step-by-Step Instructions!
Goals…
- Tags
- Coding
- Explosions!

Download the finished code for this blog article @ Github Repo
Tags
- Let’s repurpose our original cube into a target!
- In Unity we can “tag” different objects so when they collide we can have different reactions. For example, we will tag the cube as a target which we’ll make explode and disappear — where the ground and the table will not…
- (Hierarchy) Click Cube
- (Inspector) Click the dropdown arrow next to Tag
- Click Add Tag
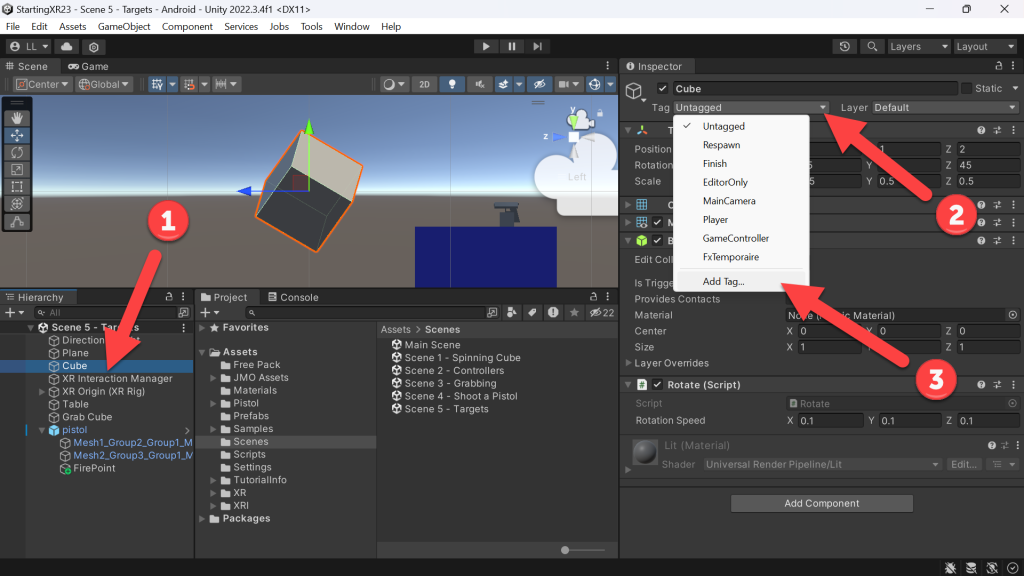
- (Tags & Layers) Click the “+” button
- Type target
- Click Save
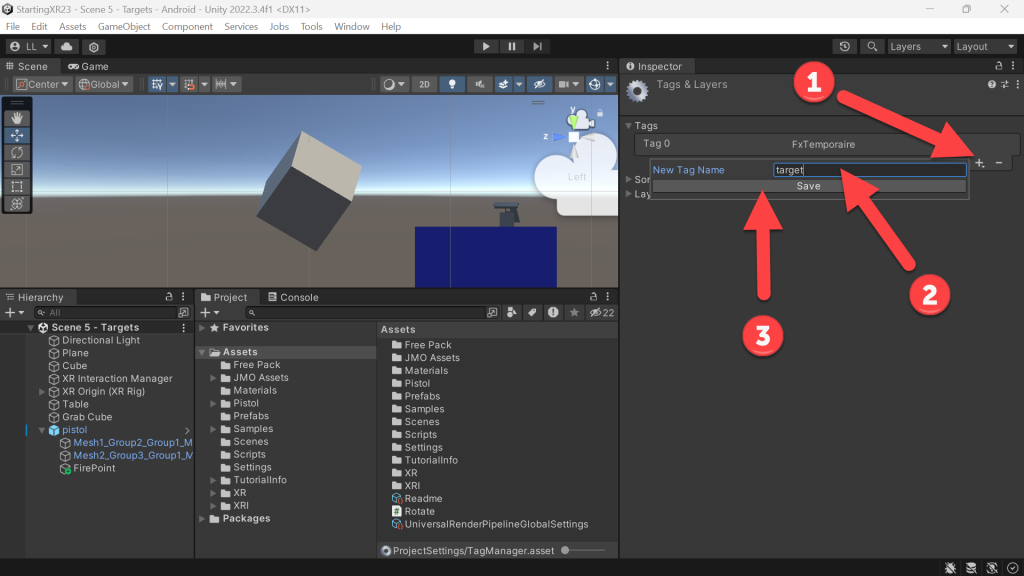
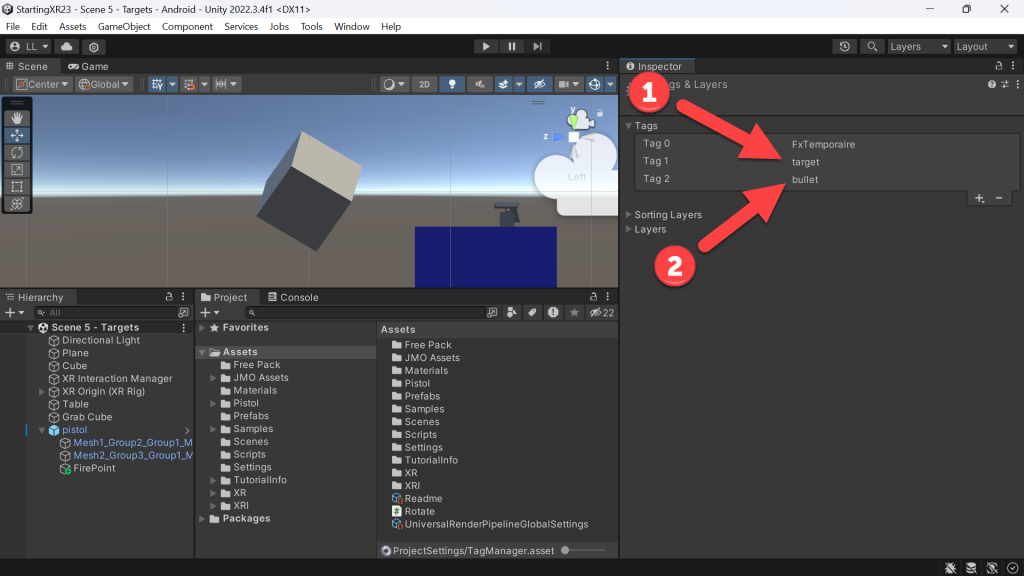
- (Tags) Should see target tag
- (Tags) Add a bullet tag
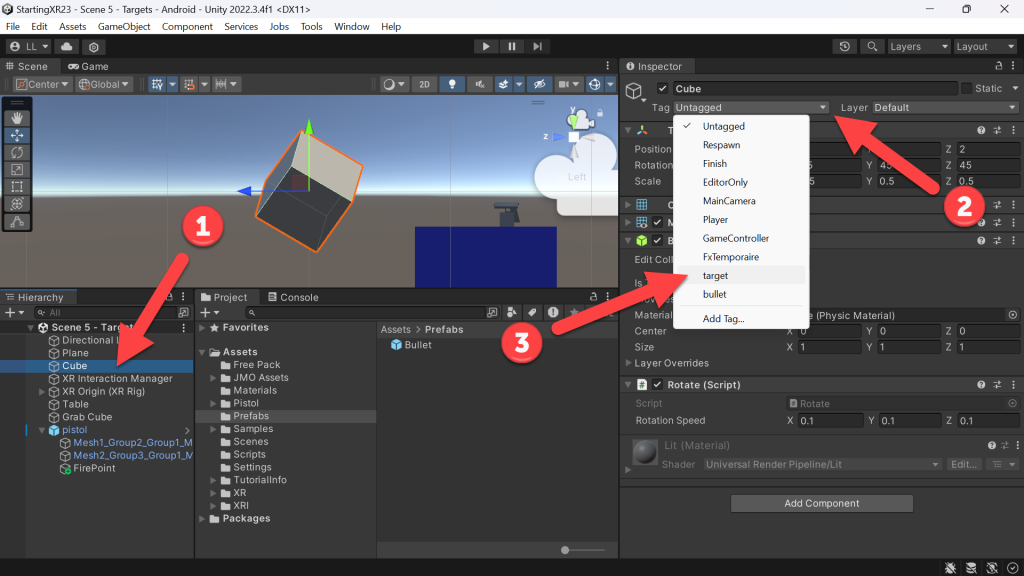
- (Hierarchy) Click Cube
- (Inspector) Click Tag dropdown
- Click target
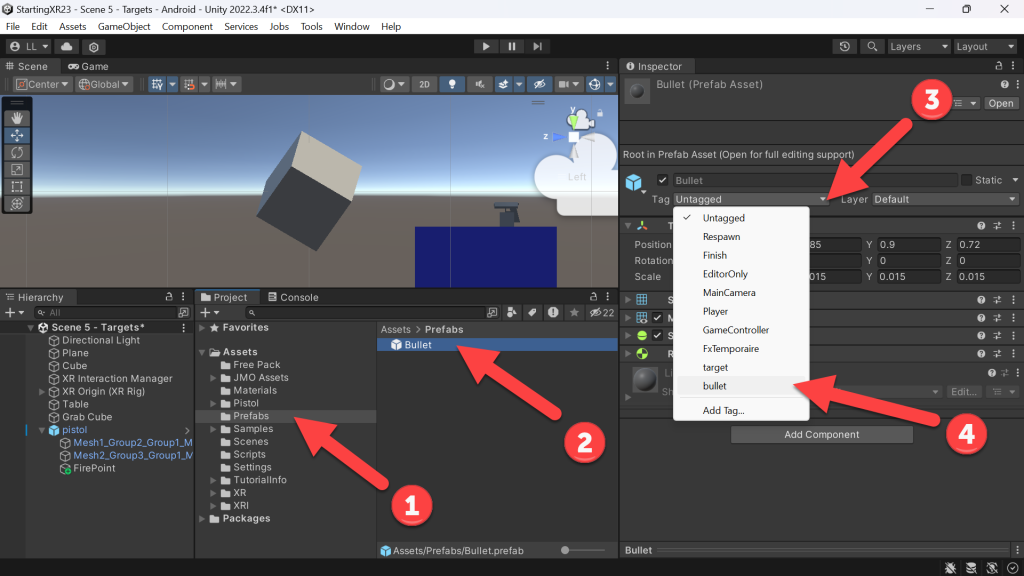
- (Project) Click Prefabs folder
- Click Bullet
- (Inspector) Click the Tag dropdown
- Click bullet
Coding
- We have everything we need tagged, now lets add code looking for collision between objects with those tags.
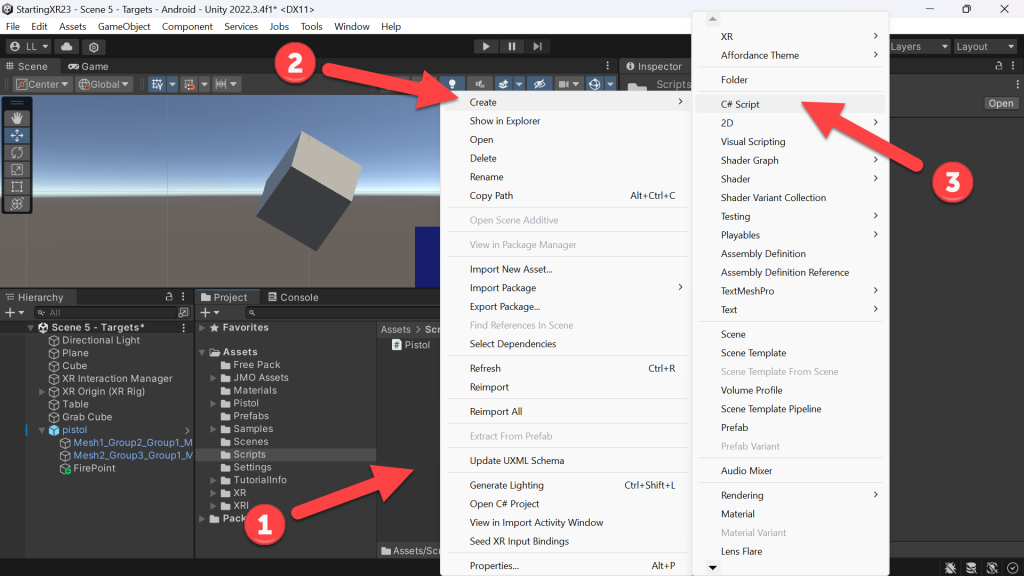
- (Project) Right-Click in Scripts folder
- Click Create
- Click C# Scripts -> Rename it Target
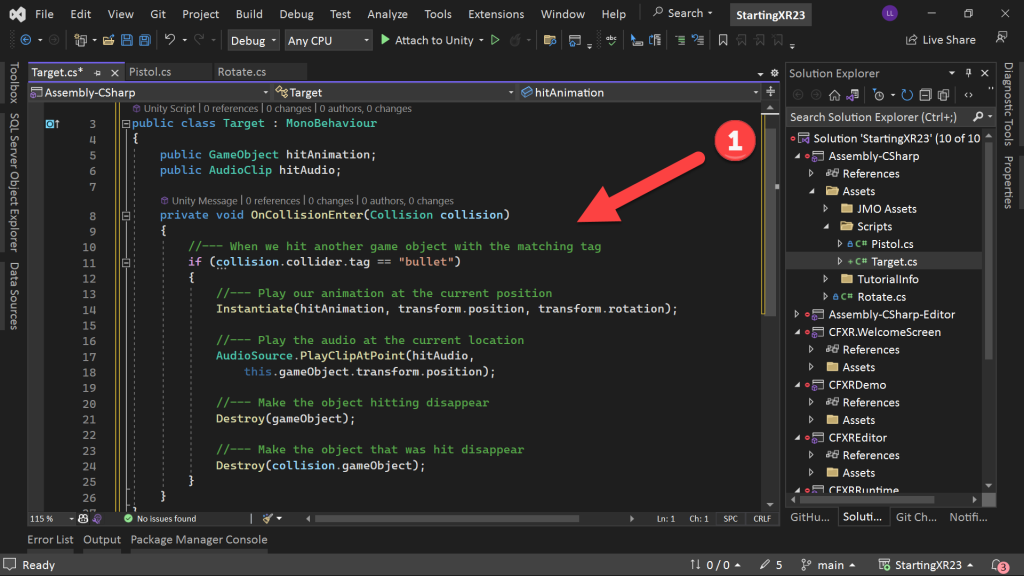
- Look through the comments in the code… Make sure to SAVE after updating the code
- In a nutshell, we’re looking for a collision with an object that is tagged as bullet
- Playing the explosion animation
- Playing the audio
- Destroying both objects
using UnityEngine;

public class Target : MonoBehaviour
{
    public GameObject hitAnimation;
    public AudioClip hitAudio;

    private void OnCollisionEnter(Collision collision)
    {
        //--- When we hit another game object with the matching tag
        if (collision.collider.tag == "bullet")
        {
            //--- Play our animation at the current position
            Instantiate(hitAnimation, transform.position, transform.rotation);

            //--- Play the audio at the current location
            AudioSource.PlayClipAtPoint(hitAudio,
                this.gameObject.transform.position);

            //--- Make the object hitting disappear
            Destroy(gameObject);

            //--- Make the object that was hit disappear
            Destroy(collision.gameObject);
        }
    }
}
Explosions!
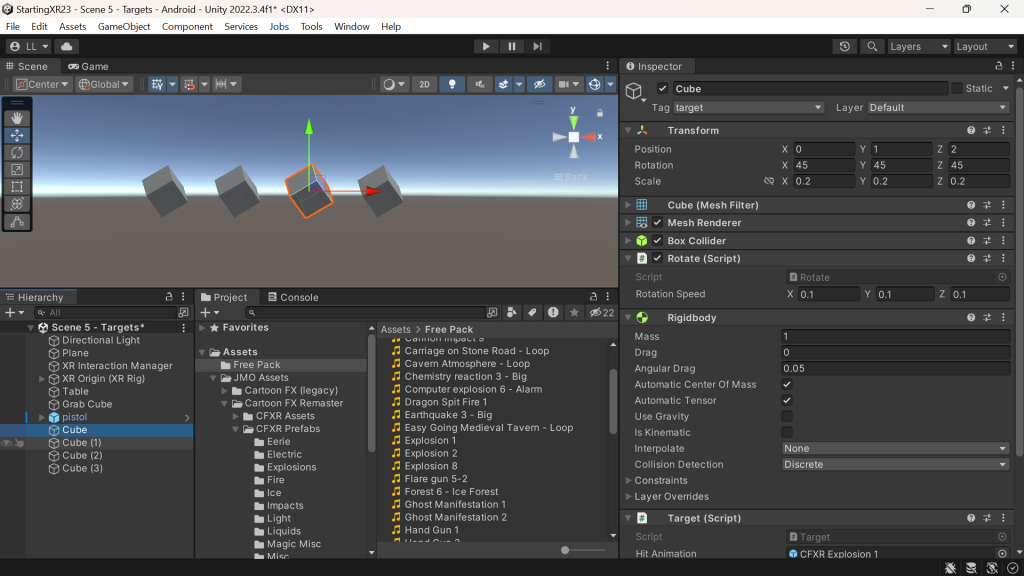
- We can apply the Target script to anything we want to explode – so let’s do that – and then make a bunch of targets!
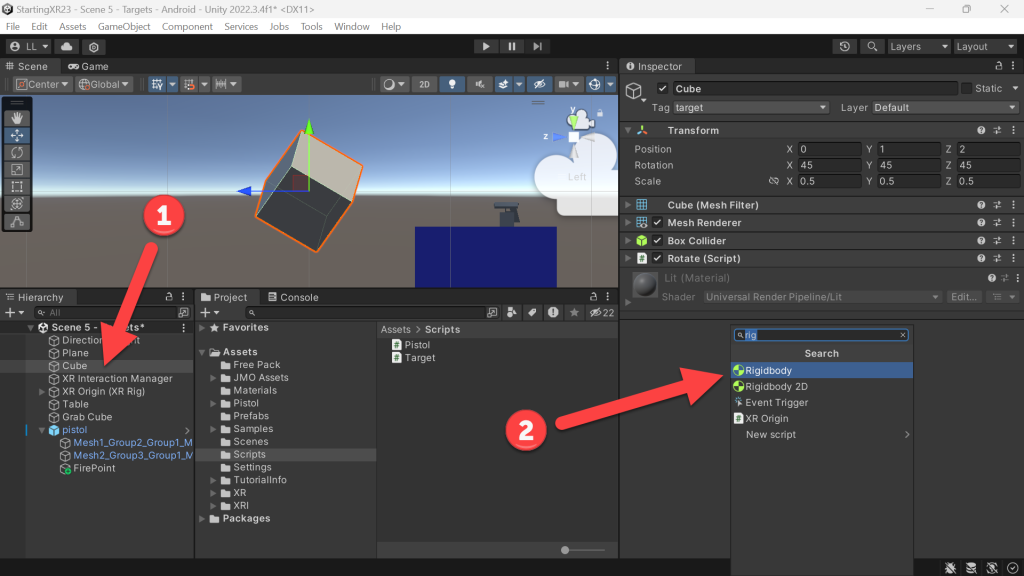
- (Hierarchy) Click Cube
- (Inspector) Click Add Component -> Add Rigidbody
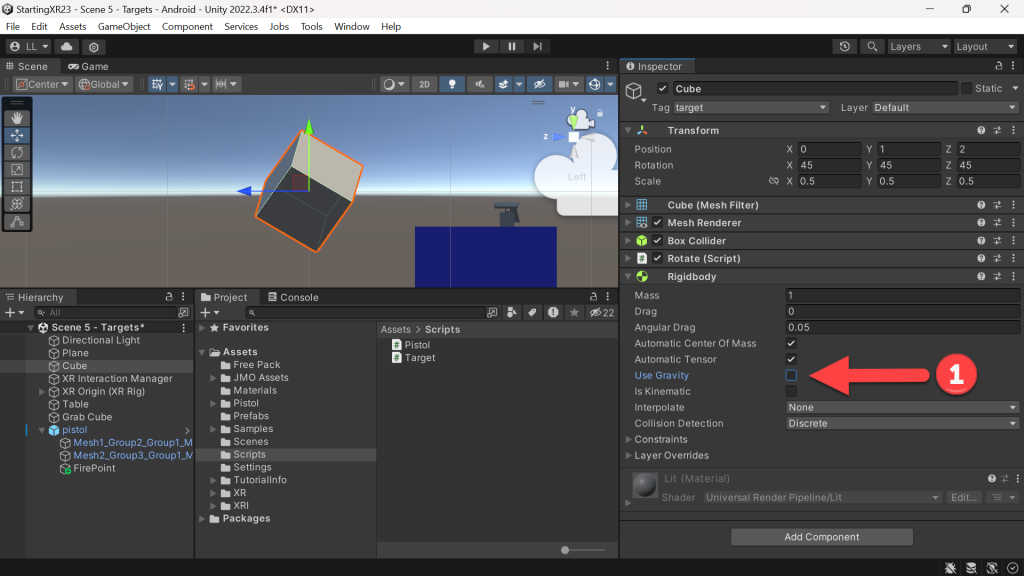
- (Inspector) Within Rigidbody -> Uncheck Use Gravity
- We don’t want our targets to come crashing down… 🙂
- (Inspector) Shrink our Cube’s dimensions down a bit…

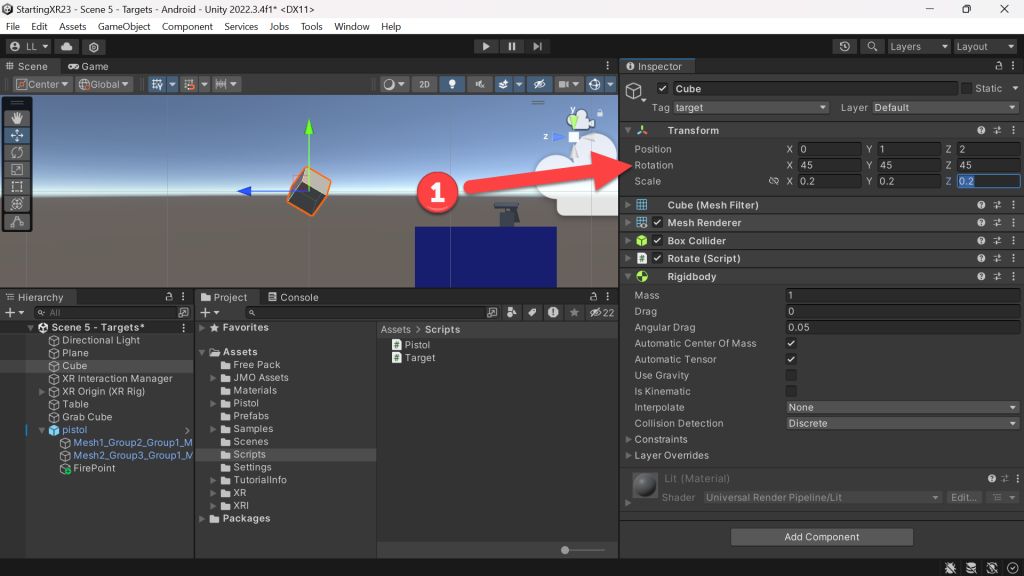
- (Project) Click Scripts folder -> Drag Target script onto Cube
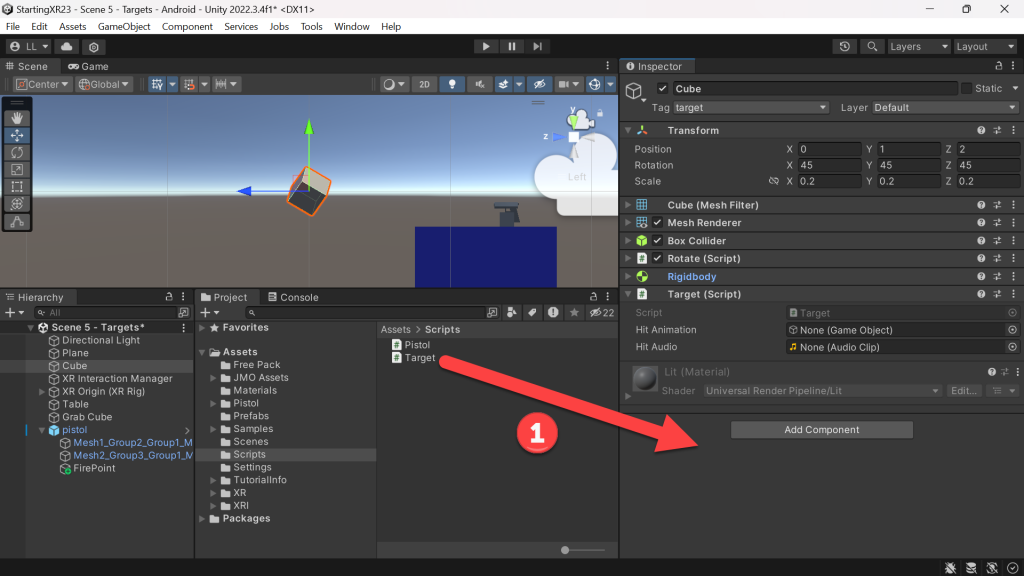
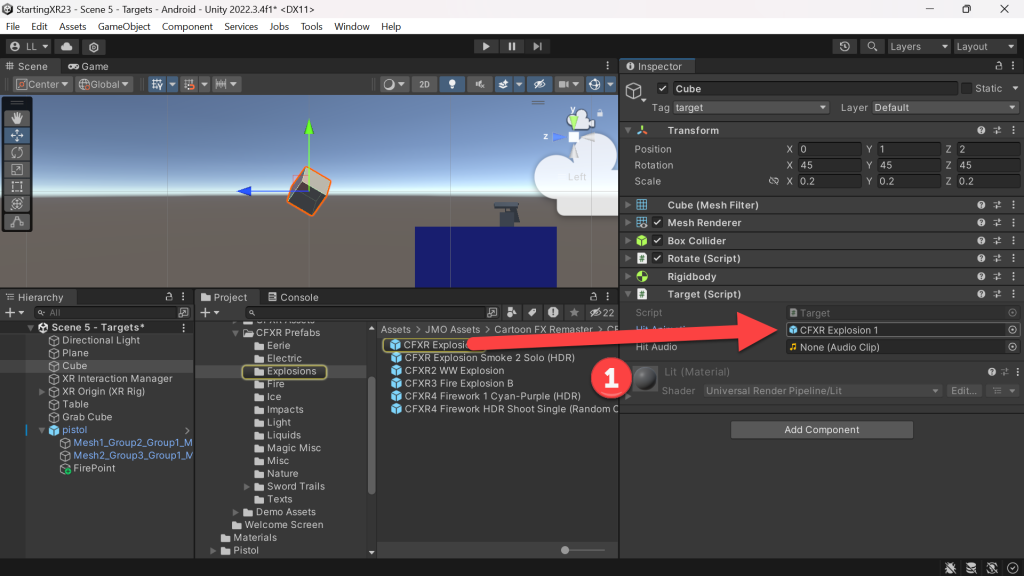
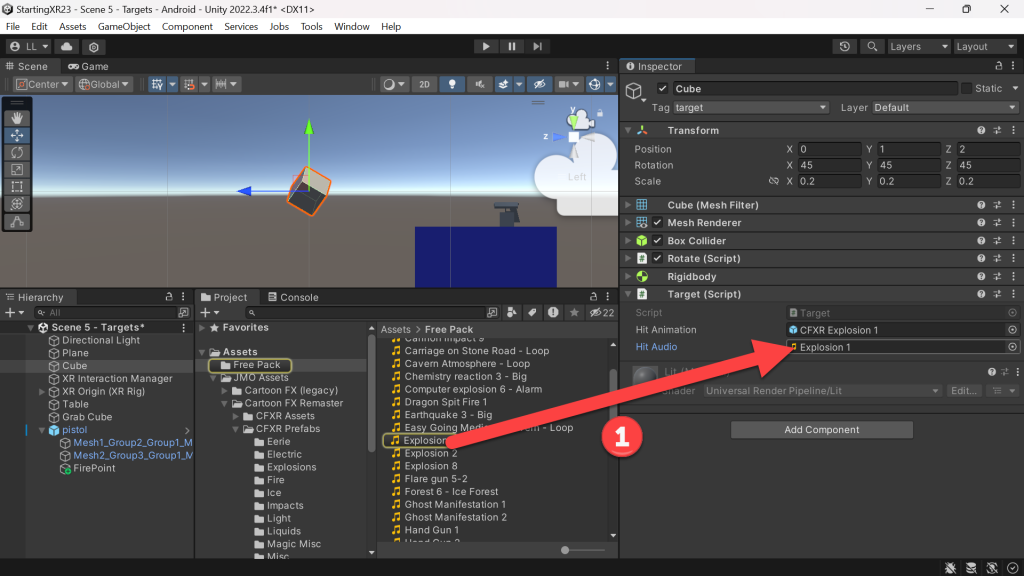
- Let’s add the explosion animation and sound!
- (Project) Drag CFXR Explosion 1 into Hit Animation
- (Project) Drag Explosion 1 into Hit Audio
- Build and Run!
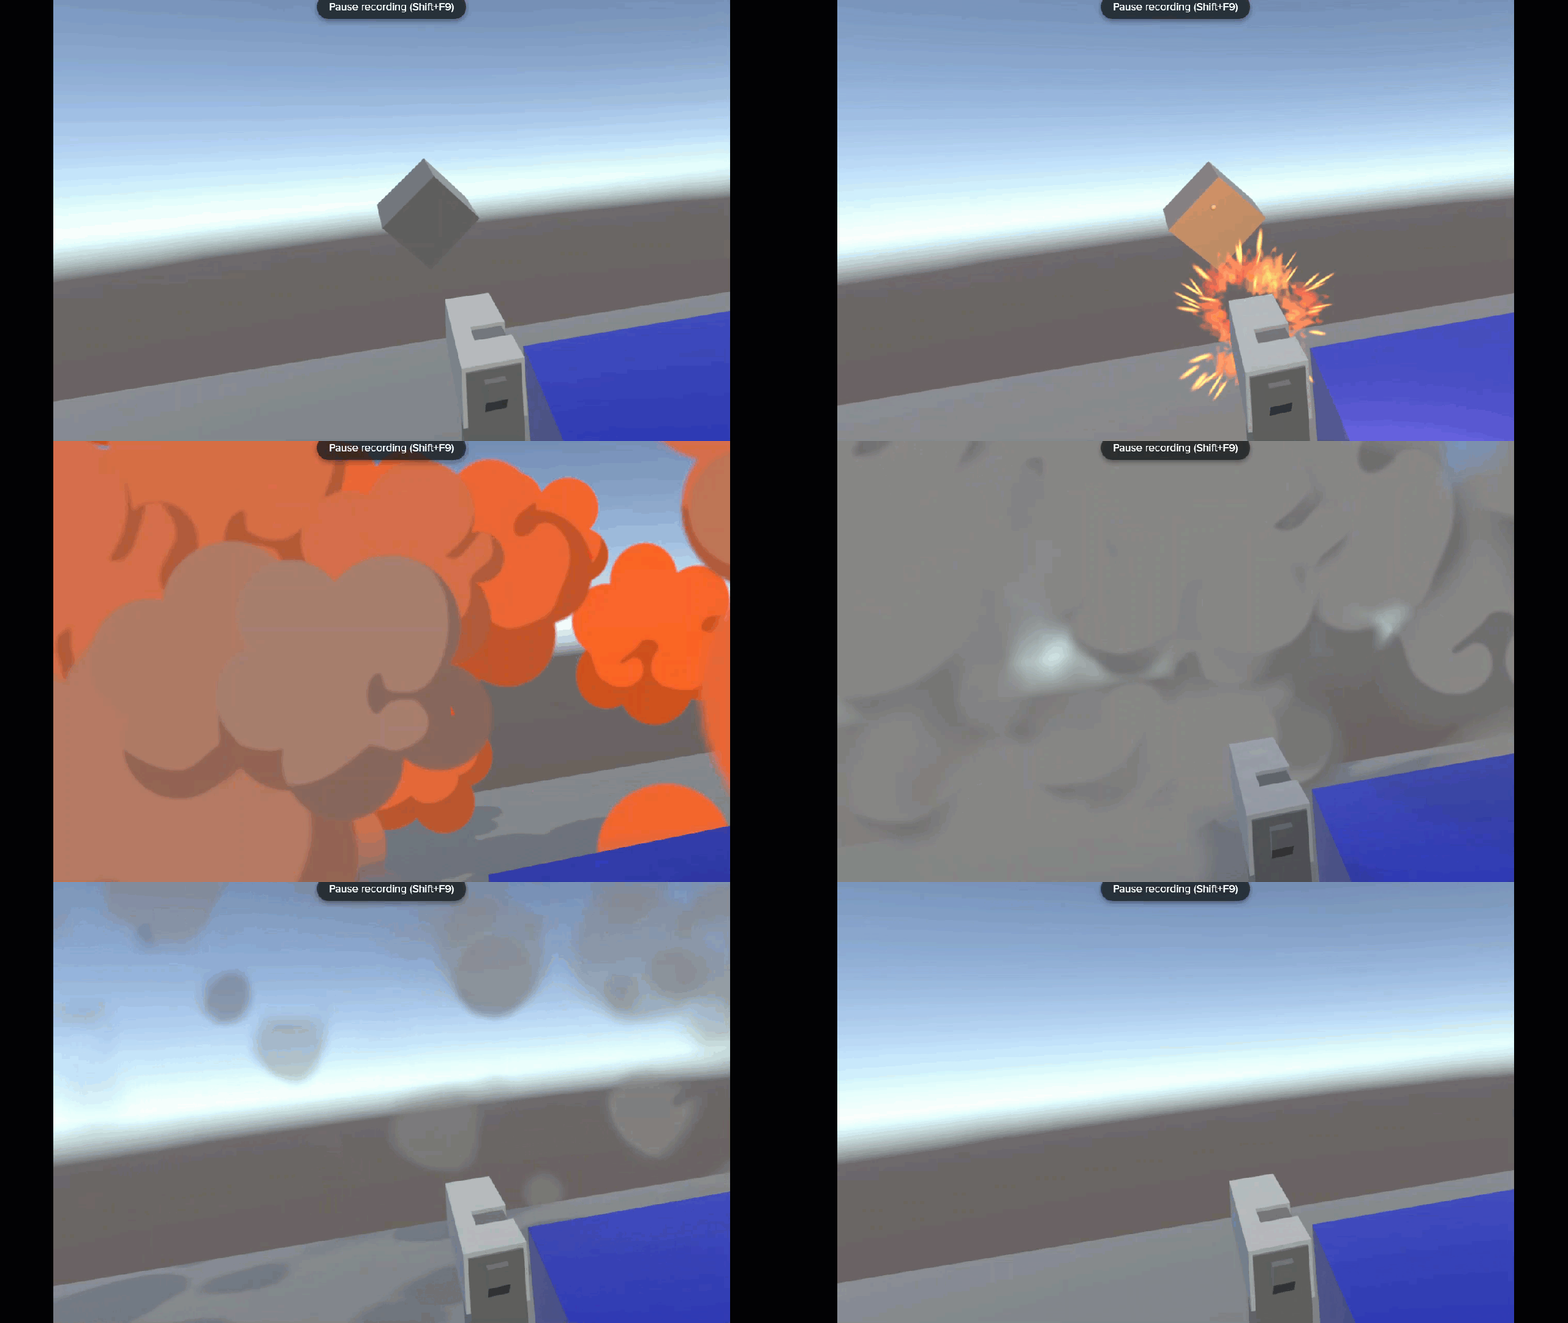
- One last small thing… I want more targets…
- Easy, you can just click on Cube – then CTRL-C CTRL-V and drag them to where you want them in the scene — more explosions!
I always love feedback and suggestions for new XR / AI blog posts!
Go build something amazing in XR & AI! — Lance 🙂
Check out other blog articles in this (and other) series!
Quick links to Lance’s latest XR Step-by-Step blog articles by device
